Virtual and Augmented Reality together are now referred to as XR or “Extended-Reality”. You’re in the right place at the right time to build something amazing in XR!
XR applications can be created in Unity for many devices, our focus will be on Microsoft Hololens and the Oculus Quest 2 – in this blog post series we will specifically focus on Oculus Quest 2 in the latest Unity 2021.
We added touch controllers in part 5, now we want to be able add functionality based on pressing buttons, triggers, ect on those controllers! Let’s get coding!
Here’s my XR Step-by-Step blog series for the Oculus Quest to help you create your XR experiences!
1) Installing the Tools you need for XR development == Unity 2021
2) Setting up your Oculus Quest XR project in Unity 2021!
3) Setting up Mixed-Reality Passthrough for your Oculus Quest XR project in Unity 2021!
4) Keep your XR project safe with a GitHub Code Repo!
5) Setting up Touch Controller for your Oculus Quest XR project in Unity 2021!
6) Coding your Touch Controller for your Oculus Quest XR project in Unity 2021!
Quick Reference summary of all steps to add controllers for your XR project, followed by the detailed Step-by-Step with images!
- (Hierarchy) Expand OVRCameraRig -> Right-Click CenterEyeAnchor -> 3D Object -> Text – TextMeshPro
- (Hierarchy) Click on Text (TMP) -> (Inspector) Rename to DisplayMessages
- (Inspector) Set Pos Z to 0.5 -> Set Scale X, Y and Z to 0.01
- (Project) Right-Click Assets -> Create -> Folder -> Name it _Scripts
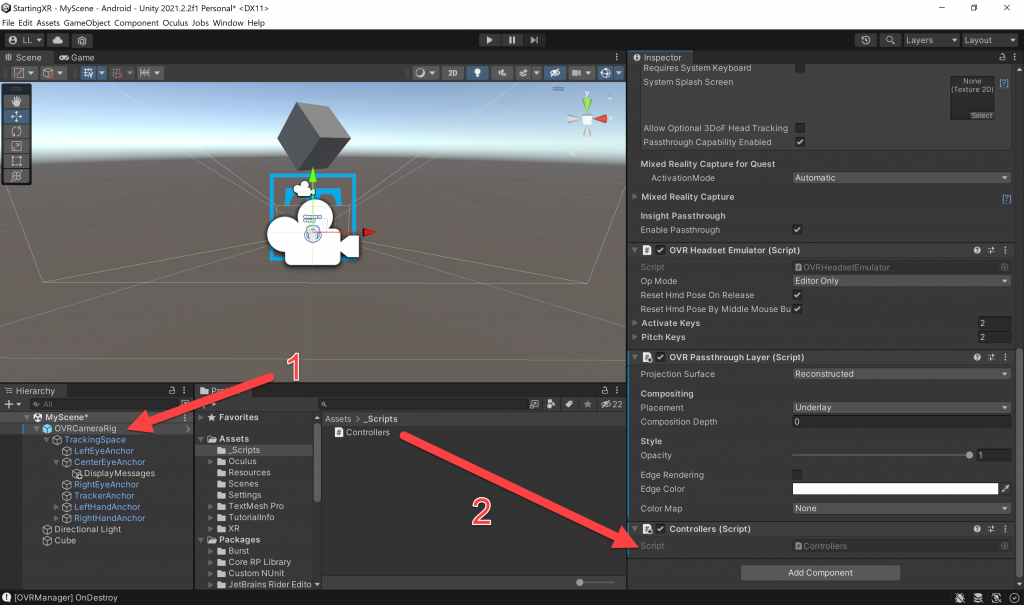
- (Project) Right-Click _Scripts -> Create -> C# Script -> Name it Controllers
- (Project) Double-Click on your Controllers script -> Update script to C# code below!
- (Hierarchy) Click OVRCameraRig -> (Project) Drag the Controllers script onto the bottom of the (Inspector) panel
Full Step-by-Step Instructions!
- We’ll need a way to show what buttons we’re pressing – so let’s start by adding a Text component to display messages
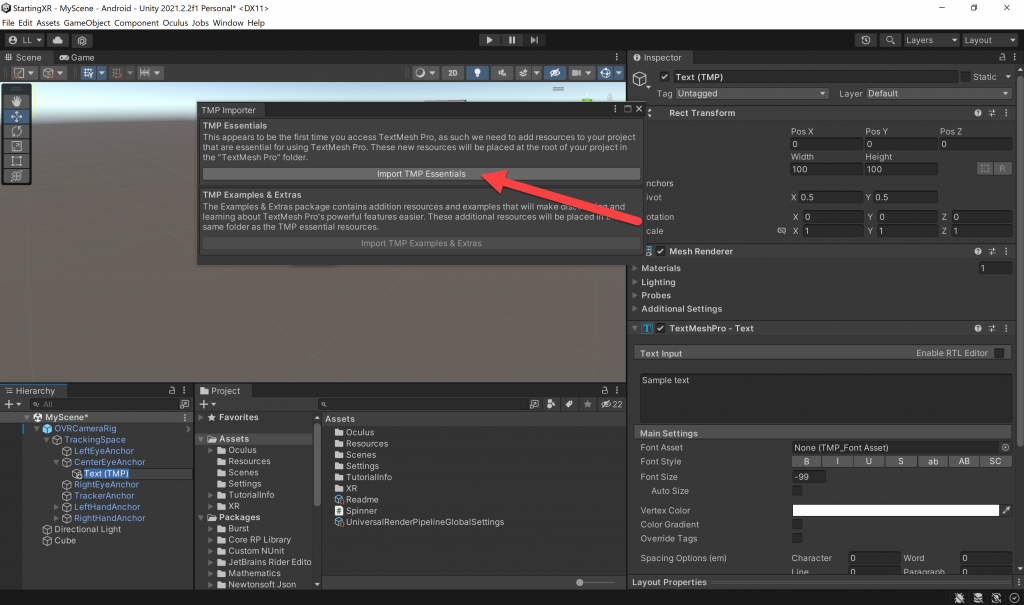
- (Hierarchy) Expand OVRCameraRig -> Right-Click CenterEyeAnchor -> 3D Object -> Text – TextMeshPro

- (TMP Importer) Click Import TMP Essentials – this only happens the first time you use a TextMeshPro asset
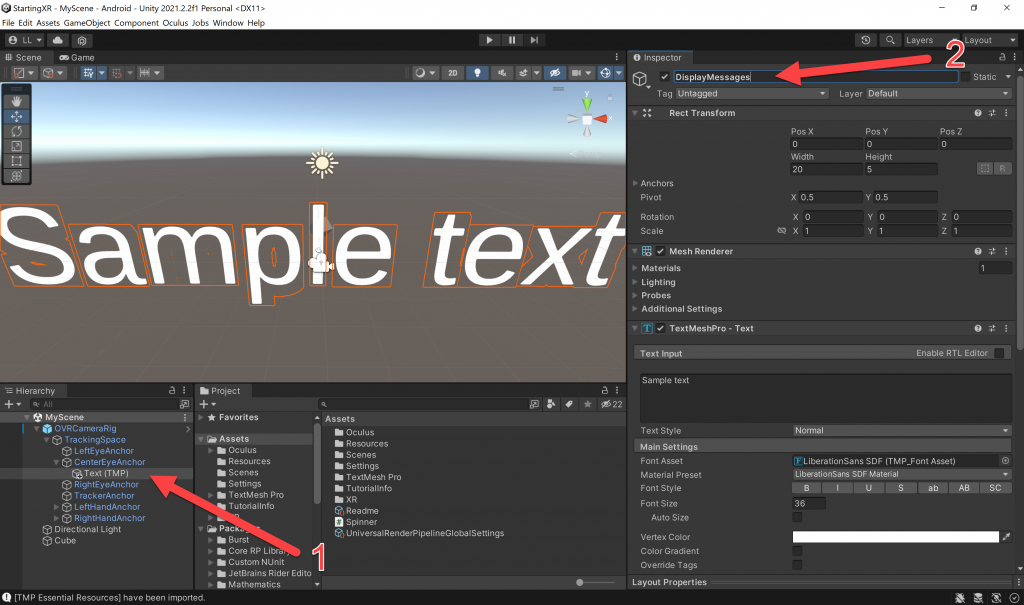
- (Hierarchy) Click on Text (TMP)
- (Inspector) Rename to DisplayMessages
- Let’s make the text smaller and visible to the user
- (Inspector)
- Set Pos Z to 0.5
- Set Scale X, Y and Z to 0.01
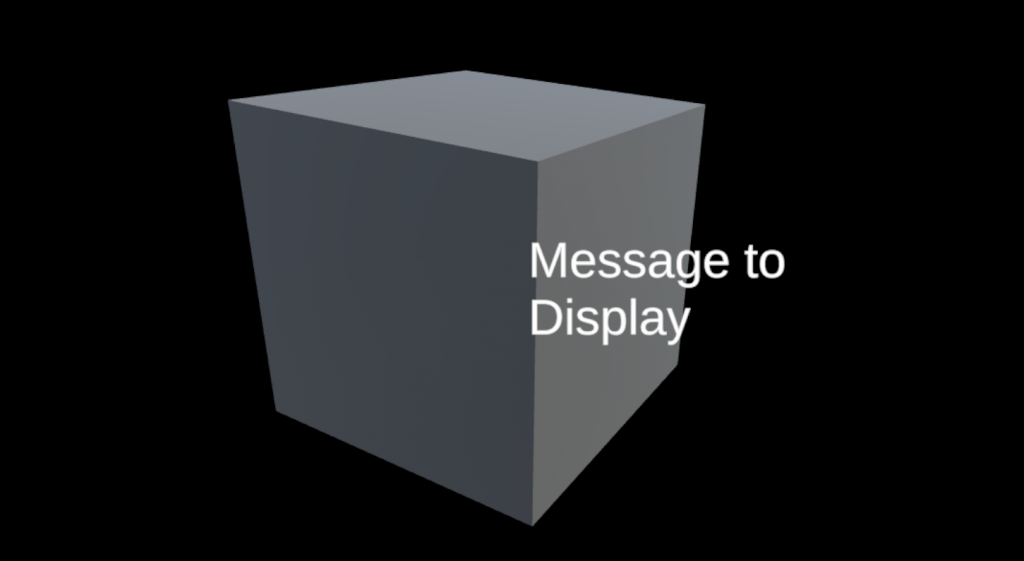
- Change the Text Input to something like Message to Display
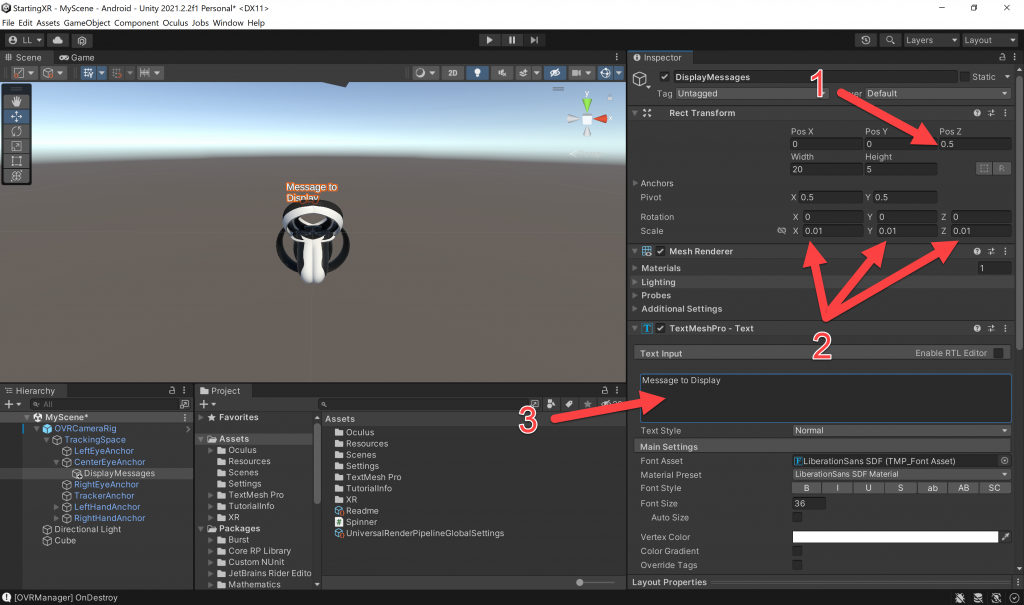
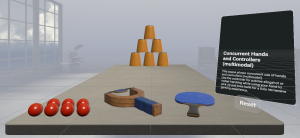
- Run your project and you should see the following!
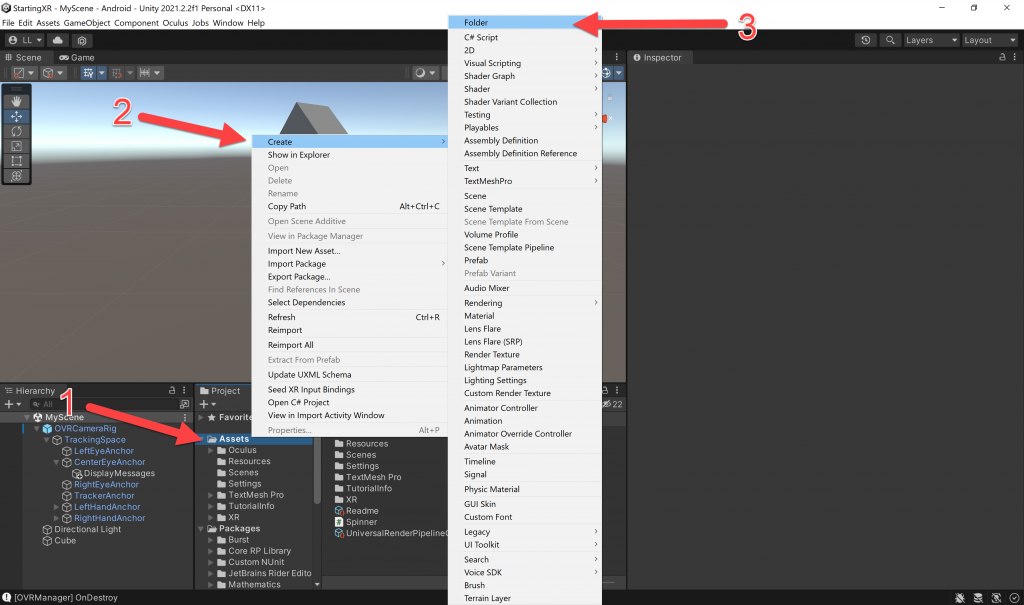
- Cool! Now we can start coding our controller script! Let’s create a folder for our scripts.
- (Project) Right-Click Assets -> Create -> Folder -> Name it _Scripts
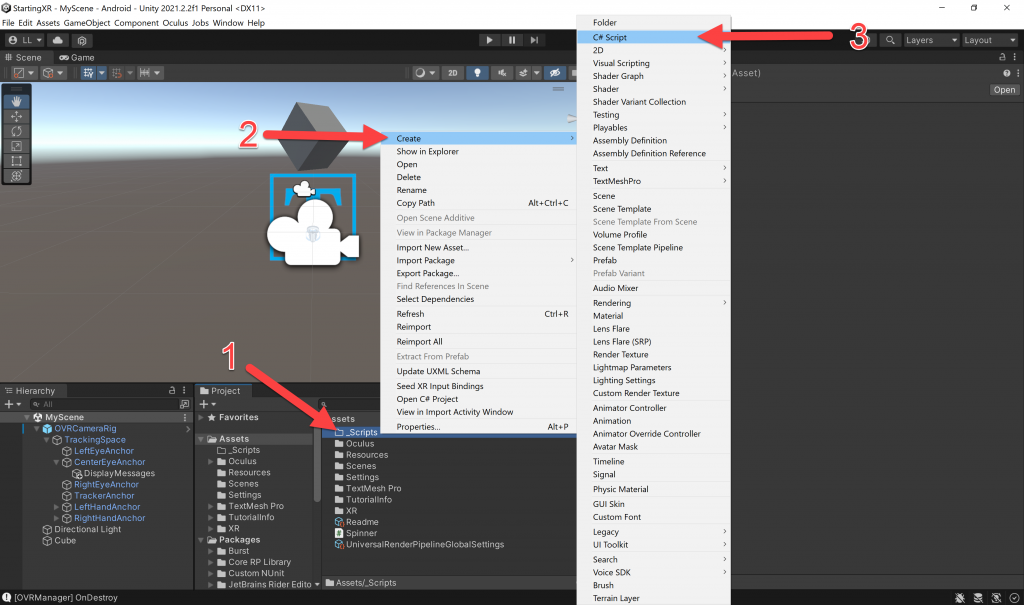
- (Project) Right-Click _Scripts -> Create -> C# Script -> Name it Controllers
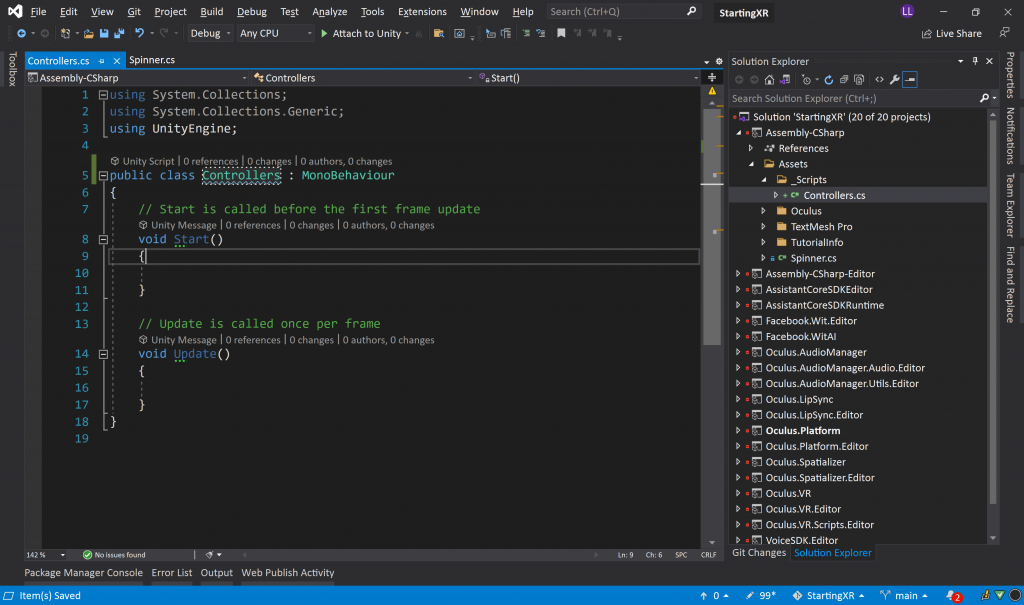
- (Project) Double-Click on your Controllers script

- Visual Studio will launch and you’ll see the following!
- Here’s the layout of the buttons for the Quest Controllers
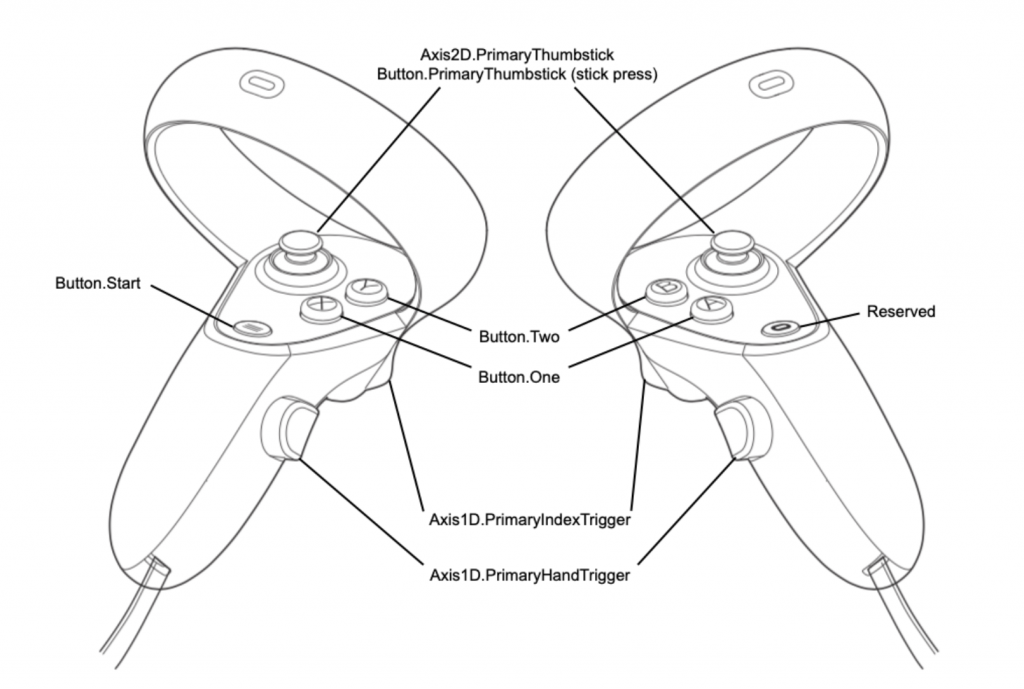
- Looking at the diagram above, we can detect each button — but we may want to know when the button is pressed down, when it’s held down or when the button is released. We get all of those events with the following.
GetUp()queries if a controller was released this frameGetDown()queries if a controller was pressed this frameGet()queries the current state of a controller — not using this one in our program, but easy to add 🙂
- See https://developer.oculus.com/documentation/unity/unity-ovrinput/ for even more info!
- Here is the full controller code script!
using System.Collections;
using System.Collections.Generic;
using UnityEngine;
using TMPro; //--- Added for our text messages component!

public class Controllers : MonoBehaviour
{
    private TextMeshPro _messages = new();

    // Start is called before the first frame update
    void Start()
    {
        //--- Get the text message component so we can write messages to it!
        _messages = GameObject.Find("DisplayMessages").GetComponent<TextMeshPro>();
        if (_messages != null)
        {
            _messages.text = "Press a Button!";
        }
        else
        {
            Debug.Log("Component not found!");
        }
    }

    // Update is called once per frame
    void Update()
    {
        //--- Right Controller
        if (OVRInput.GetDown(OVRInput.Button.One, OVRInput.Controller.RTouch))
        {
            _messages.text = "A Button (Down)";
        }
        else if (OVRInput.GetUp(OVRInput.Button.One, OVRInput.Controller.RTouch))
        {
            _messages.text = "A Button (Up)";
        }

        if (OVRInput.GetDown(OVRInput.Button.Two, OVRInput.Controller.RTouch))
        {
            _messages.text = "B Button (Down)";
        }
        else if (OVRInput.GetUp(OVRInput.Button.Two, OVRInput.Controller.RTouch))
        {
            _messages.text = "B Button (Up)";
        }

        if (OVRInput.GetDown(OVRInput.Button.PrimaryIndexTrigger, OVRInput.Controller.RTouch))
        {
            _messages.text = "Right Trigger (Down)";
        }
        else if (OVRInput.GetUp(OVRInput.Button.PrimaryIndexTrigger, OVRInput.Controller.RTouch))
        {
            _messages.text = "Right Trigger (Up)";
        }

        if (OVRInput.GetDown(OVRInput.Button.PrimaryHandTrigger, OVRInput.Controller.RTouch))
        {
            _messages.text = "Right Grip (Down)";
        }
        else if (OVRInput.GetUp(OVRInput.Button.PrimaryHandTrigger, OVRInput.Controller.RTouch))
        {
            _messages.text = "Right Grip (Up)";
        }

        //--- Left Controller
        if (OVRInput.GetDown(OVRInput.Button.One, OVRInput.Controller.LTouch))
        {
            _messages.text = "X Button (Down)";
        }
        else if (OVRInput.GetUp(OVRInput.Button.One, OVRInput.Controller.LTouch))
        {
            _messages.text = "X Button (Up)";
        }

        if (OVRInput.GetDown(OVRInput.Button.Two, OVRInput.Controller.LTouch))
        {
            _messages.text = "Y Button (Down)";
        }
        else if (OVRInput.GetUp(OVRInput.Button.Two, OVRInput.Controller.LTouch))
        {
            _messages.text = "Y Button (Up)";
        }

        if (OVRInput.GetDown(OVRInput.Button.PrimaryIndexTrigger, OVRInput.Controller.LTouch))
        {
            _messages.text = "Left Trigger (Down)";
        }
        else if (OVRInput.GetUp(OVRInput.Button.PrimaryIndexTrigger, OVRInput.Controller.LTouch))
        {
            _messages.text = "Left Trigger (Up)";
        }

        if (OVRInput.GetDown(OVRInput.Button.PrimaryHandTrigger, OVRInput.Controller.LTouch))
        {
            _messages.text = "Left Grip (Down)";
        }
        else if (OVRInput.GetUp(OVRInput.Button.PrimaryHandTrigger, OVRInput.Controller.LTouch))
        {
            _messages.text = "Left Grip (Up)";
        }
    }
}
- The code is pretty straight forward – however note button One can be either A or X, so we also need to specify which controller we’re looking at too — ie. OVRInput.GetUp(OVRInput.Button.One, OVRInput.Controller.RTouch)
- Last this is we need to attach this script to a parent object — in our case we’re putting it on the OVRCameraRig
- (Hierarchy) Click OVRCameraRig -> (Project) Drag the Controllers script onto the bottom of the (Inspector) panel
- Now when you run your program you should see the following!!
Love any feedback and see you in future XR blog posts.
Build something amazing in XR! — Lance
Here’s my XR Step-by-Step blog series to help you create your XR experiences!
1) Installing the Tools you need for XR development == Unity 2021
2) Setting up your Oculus Quest XR project in Unity 2021!
3) Setting up Mixed-Reality Passthrough for your Oculus Quest XR project in Unity 2021!
4) Keep your XR project safe with a GitHub Code Repo!
5) Setting up Touch Controller for your Oculus Quest XR project in Unity 2021!
6) Coding your Touch Controller for your Oculus Quest XR project in Unity 2021!

11 thoughts on “XR Step-by-Step! Coding your Touch Controller for your Oculus Quest XR project in Unity 2021!”