Virtual and Augmented Reality together are now referred to as XR or “Extended-Reality”.
You’re in the right place at the right time to build something amazing in XR!
XR applications can be created in Unity for many devices, our focus will be on Microsoft Hololens 2 and the Meta Quest
In this blog post series we will focus on Meta Quest!
Check out other blog articles in this (and other) series!
Quick links to Lance’s latest XR Step-by-Step blog articles by device
Here is where we begin our XR experience journey! You should have the tools you need installed – if not, see the previous blog article in this series. We’ll be setting up a completely new XR experience, from beginning to end. This may seem like a lot, but take it one section at a time – the payoff is well worth it…
Full Step-by-Step Instructions!
Goals…
- Create a New Project
- Setup Unity Environment
- Change the Project to Build for the Quest
- Add a New Scene
- Customize Project Info
- Add OpenXR
- Add XR Interaction Toolkit (XRI)
- Setup New Scene
- Build and Run on Quest
- Bonus: Spinning Cube!

Download the finished code for this blog article @ Github Repo
Creating a New Project
- Open Unity Hub and click New Project

- (New Project Window) -> Editor Version -> Select the latest version of 2022 in the drop down
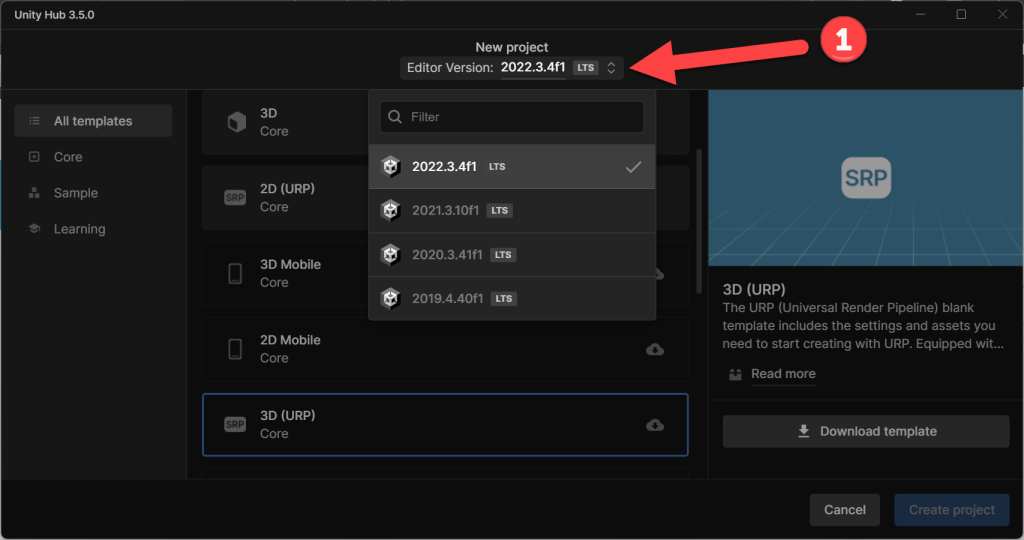
- (New Project Window) If you DO NOT have the 3D (URP) template already installed
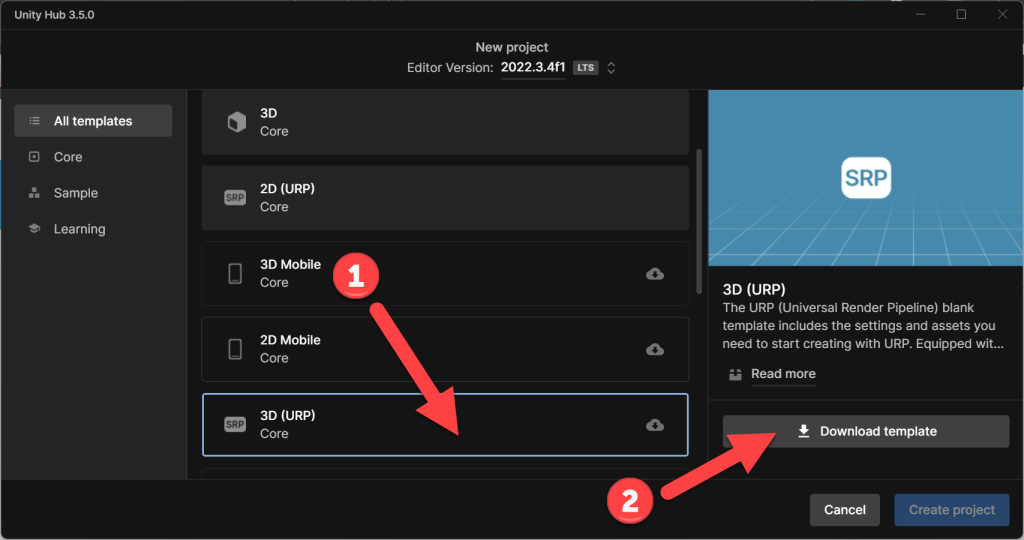
- (Templates) Click the 3D (URP) template
- Click Download template
- (New Project Window)
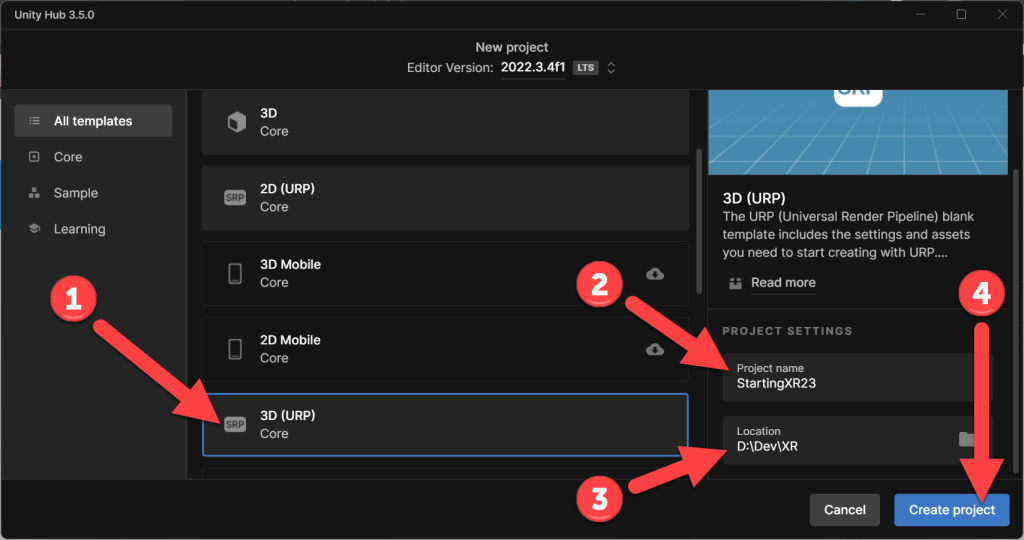
- (Templates) Click the 3D (URP) template
- (Project Name) Name your XR project
- (Location) Pick the directory in which you want the project to be created
- Click Create Project
Setup Unity Environment
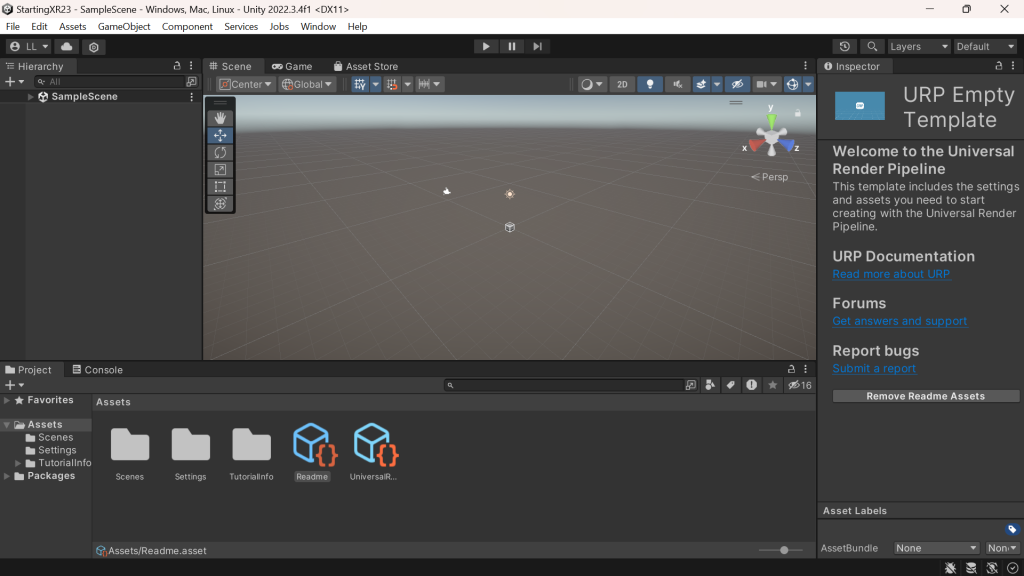
- Creating a project takes a couple of minutes – as the base projects are pretty large (~1.2GB) — here’s what we get!
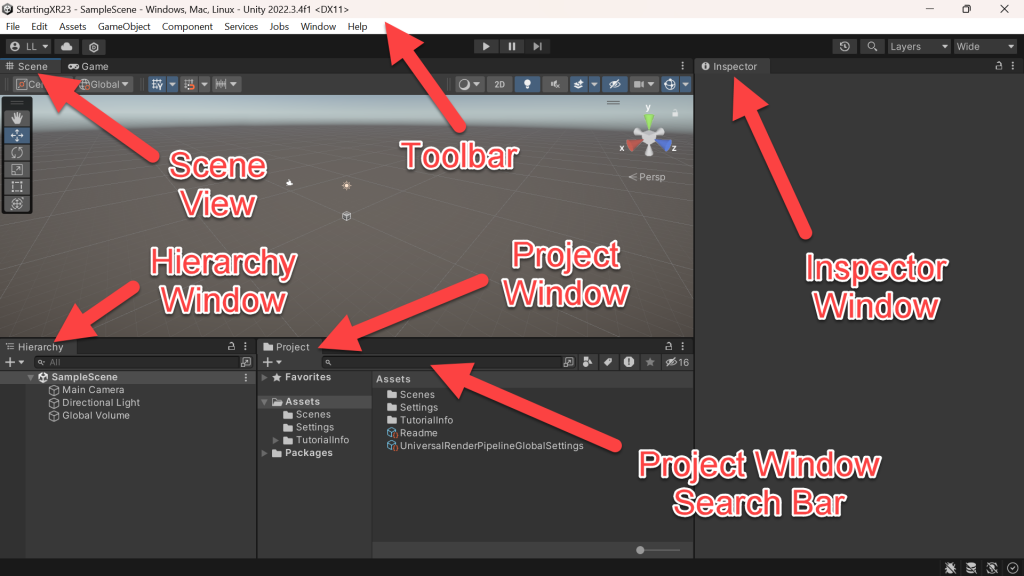
- Pro-Tip: (Toolbar) Window -> Layouts -> Wide
- There are several different layouts of your Unity windows, I prefer “Wide” layout – but find the one that you love!

- So we’re all talking about the same things, here are the parts of the Unity Window and what they are called.
Add a New Scene
- Think of a Scene as a level in a game -or- a blank canvas on which to paint, we want to make a new one so you can learn how to make as many as you want for your XR experience in the future.
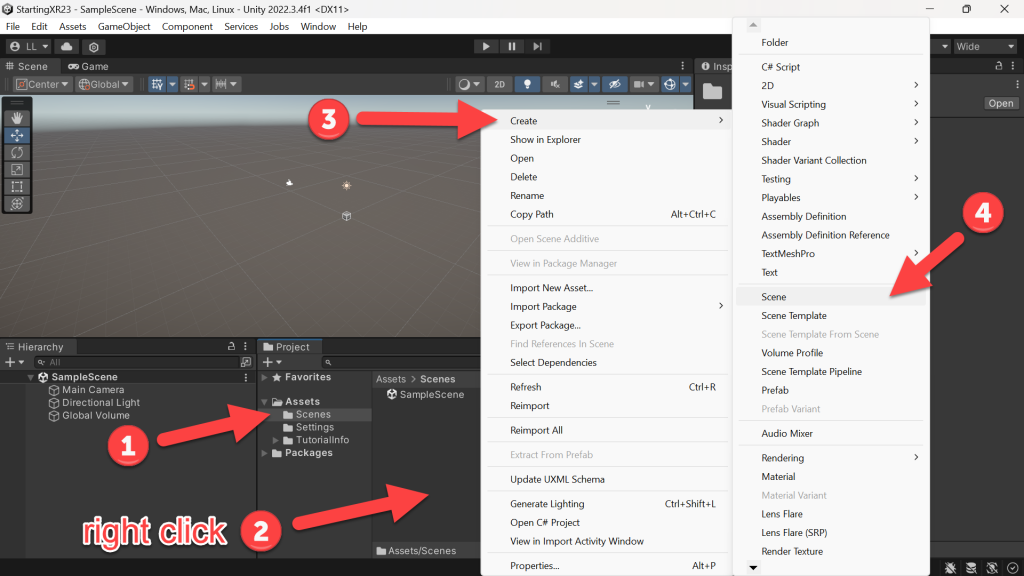
- (Project Window) Under Assets folder -> Click Scenes folder.
- (Project Window) Right-click anywhere in the open space
- Click Create
- Click Scene.
- Name it Main Scene
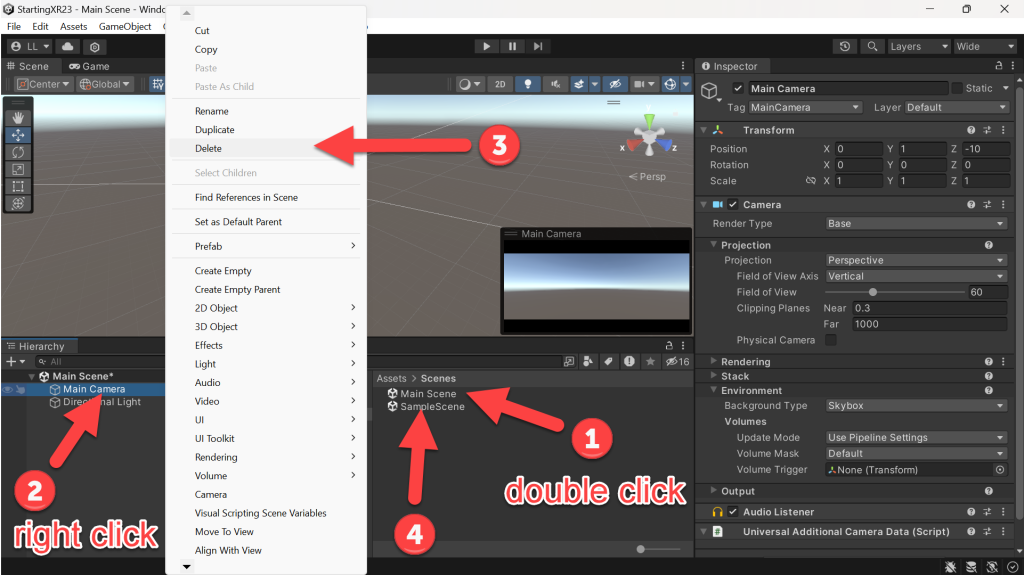
- (Project Window) Double-Click on our new Main Scene so it shows up in the (Hierarchy Window).
- (Hierarchy Window) Right-click on the Main Camera
- Click Delete.
- We do this because we we’re going to add a better camera for VR later.
- Pro-Tip: You can also just click on Main Camera and hit the DEL key
- (Project Window) Click on SampleScene and hit DEL key
Change the Project to Build for the Quest
- Unity can be used to build XR experiences for many device — for the Meta Quest it needs to be configured to be an Android build
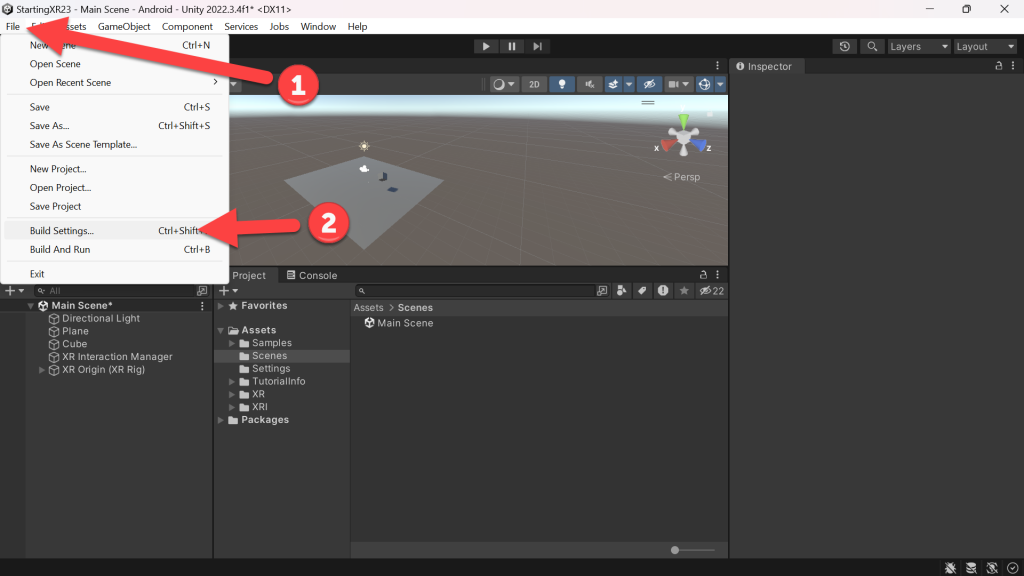
- (Toolbar) Click File
- Click Build Settings

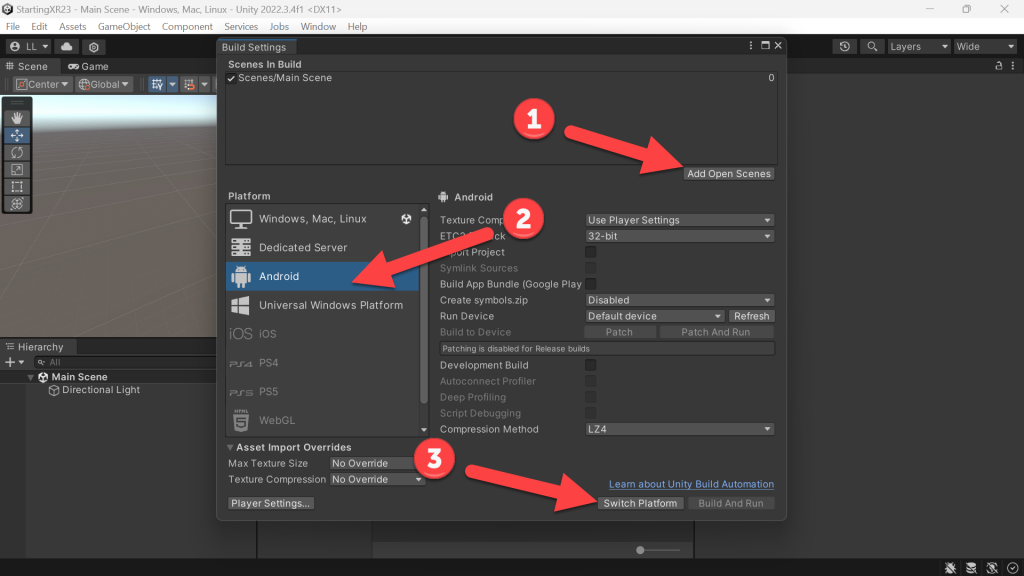
- (Build Settings) Click on the Add Open Scenes button -> Check the checkbox
- If the original scene we deleted is still there, delete it
- (Platform) Click Android
- Click on the Switch Platform button
Customize Project Info
- There are many ways to customize your Unity project settings, etc – we’ll start with easy ones in this article – but wanted to give you an idea on where to find settings like these.
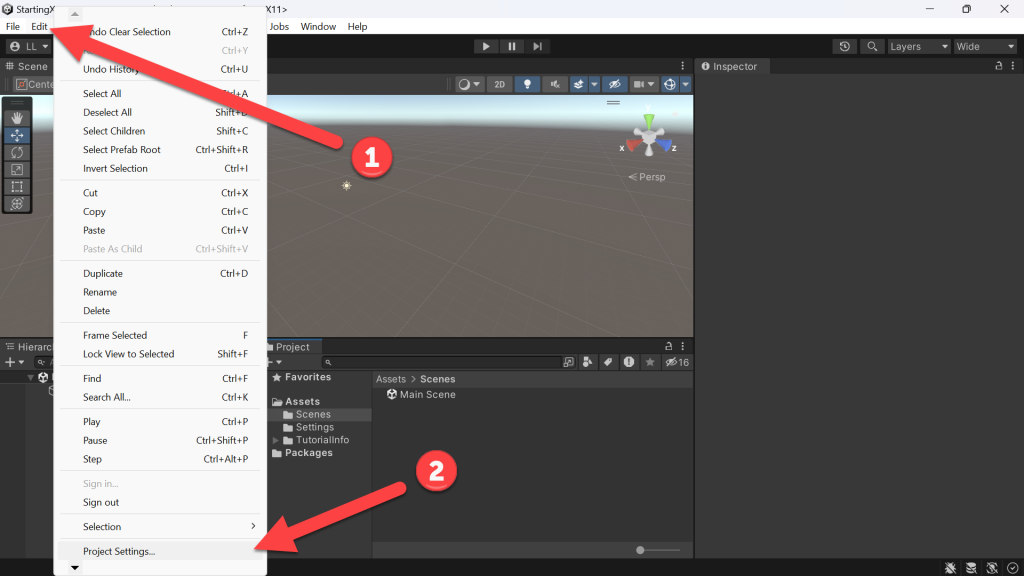
- (Toolbar) Click Edit
- Click Project Settings…
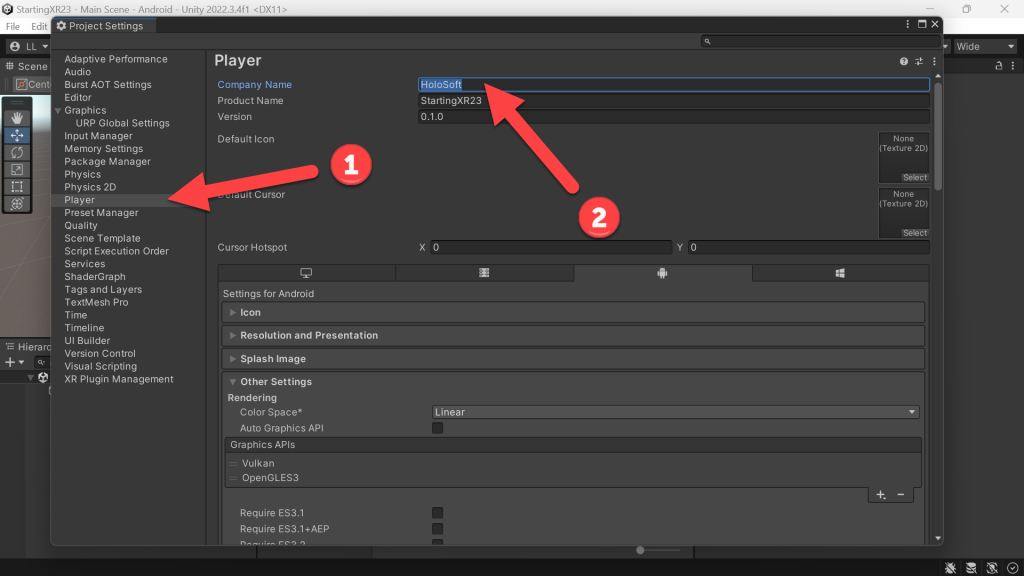
- (Project Settings) Click Player
- Change Company Name, for example I use “HoloSoft”
Add OpenXR
- So as more and more XR devices came to market of the past several years, more and more different libraries were being written for each of them. So while Unity could be used to develop for each, we couldn’t have one XR project that could be easily run across multiple devices – uggg…
- OpenXR to the rescue. OpenXR is a standard that allows developers to (generally) write one Unity application and run it across multiple devices.
- Not until THIS year (really only in the past several months) has OpenXR matured to the point where I’d recommend it over device specific libraries – now that it has – awesome XR experiences are even easier to create!
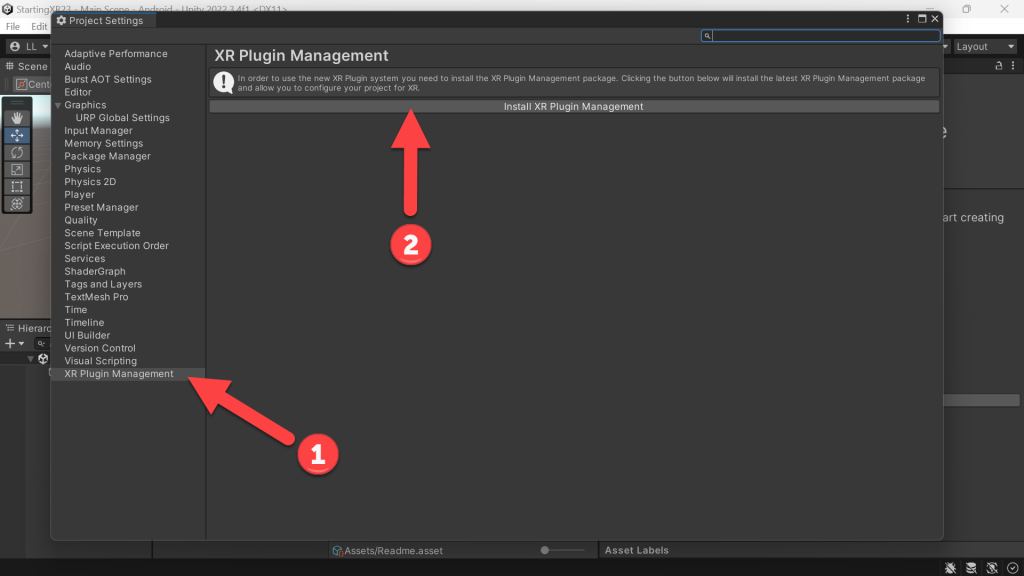
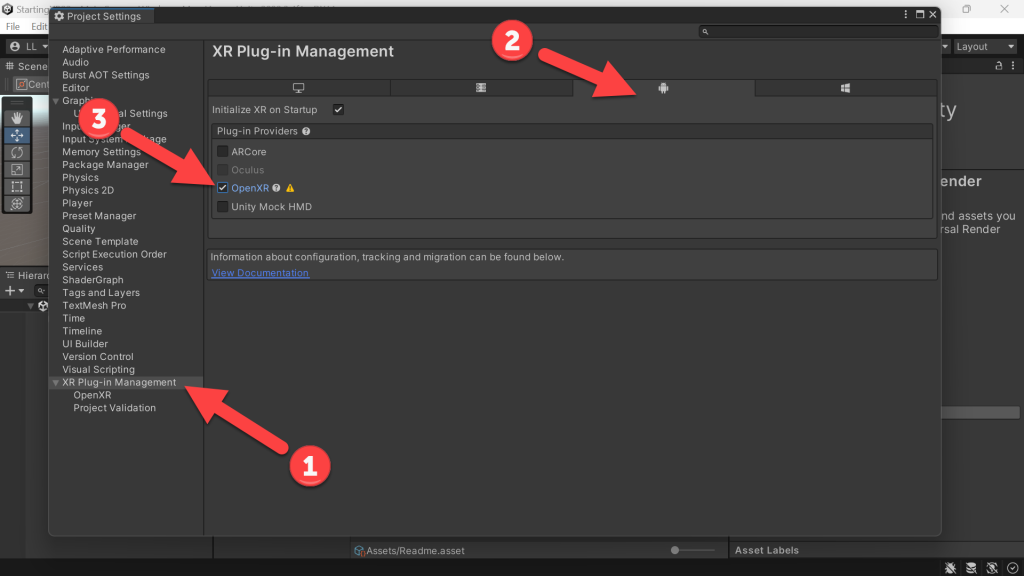
- (Project Settings) Click XR Plug-in Management
- Click Install XR Plugin Management
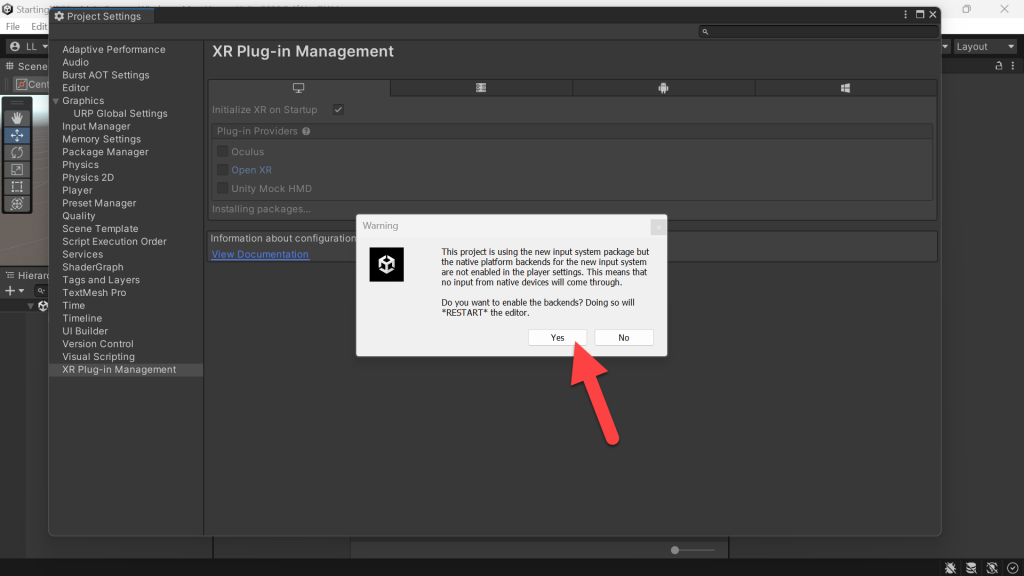
- (Project Settings) Click XR Plug-in Management
- Click the 1st tab (Windows, Mac, Linux, settings)
- Check Open XR

- Click Yes to restart
- After the project reloads
- (Project Settings) Click XR Plug-in Management
- Click the 3rd tab (Android settings)
- Check OpenXR
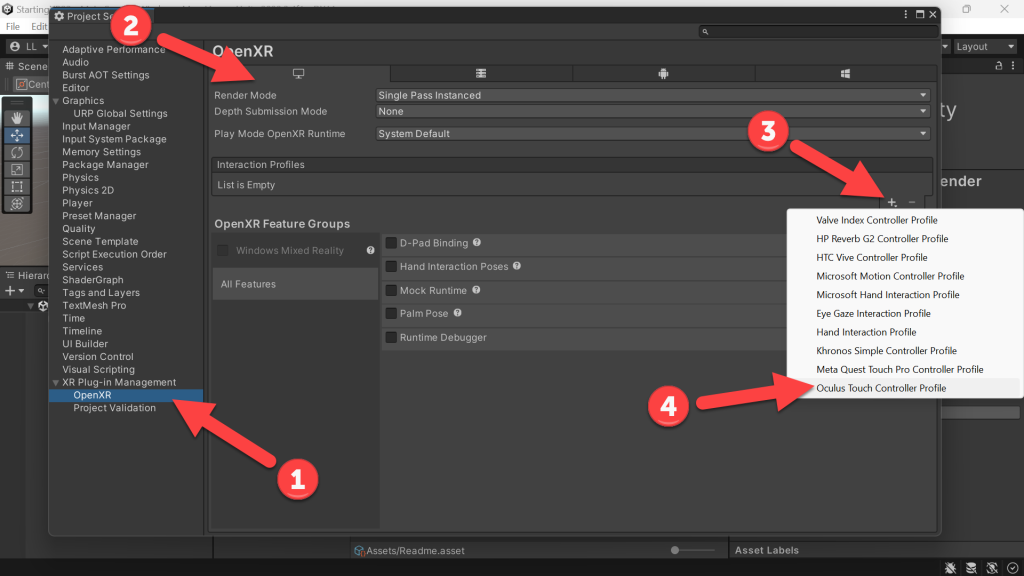
- (Project Settings) XR Plug-in Management -> Click OpenXR
- Click the 1st tab (Windows, Mac, Linux, settings)
- (Interaction Profiles) Click the “+” button
- Click Oculus Touch Controller Profile
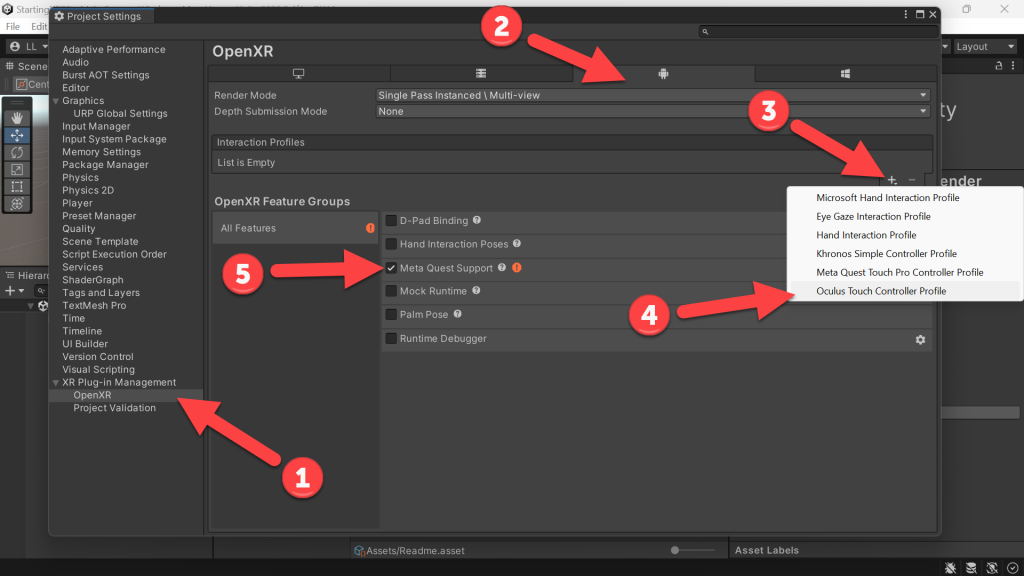
- (Project Settings) XR Plug-in Management -> Click OpenXR
- Click the 3rd tab (Android settings)
- (Interaction Profiles) Click the “+” button
- Click Oculus Touch Controller Profile
- (OpenXR Feature Groups) Check Meta Quest Support
- (Project Settings) XR Plug-in Management -> Click Project Validation
- Click the 1st tab (Windows, Mac, Linux, settings)
- Click Fix or Fix All
- Note, you may need to click on the text next the the Fix button and then the Fix button – not always the case, but seems to work when just clicking the Fix button doesn’t do it
- (Project Settings) XR Plug-in Management -> Click Project Validation
- Click the 3rd tab (Android settings)
- Click Fix All, Fix or Edit next to anything that needs attention until we have all green checks!
- Note, you may need to click on the text next the the Fix button and then the Fix button – not always the case, but seems to work when just clicking the Fix button doesn’t do it
Add XR Interaction Toolkit (XRI)
- Building on top of the OpenXR standard, the XR Interaction Toolkit (XRI) is a high-level, component-based interaction system for creating VR and AR experiences. It provides a common framework for interactions and streamlines cross-platform creation.
- This too has only very very recently become mature enough to be usable and thus why we’re fully embracing it to build the best XR experiences in Unity!
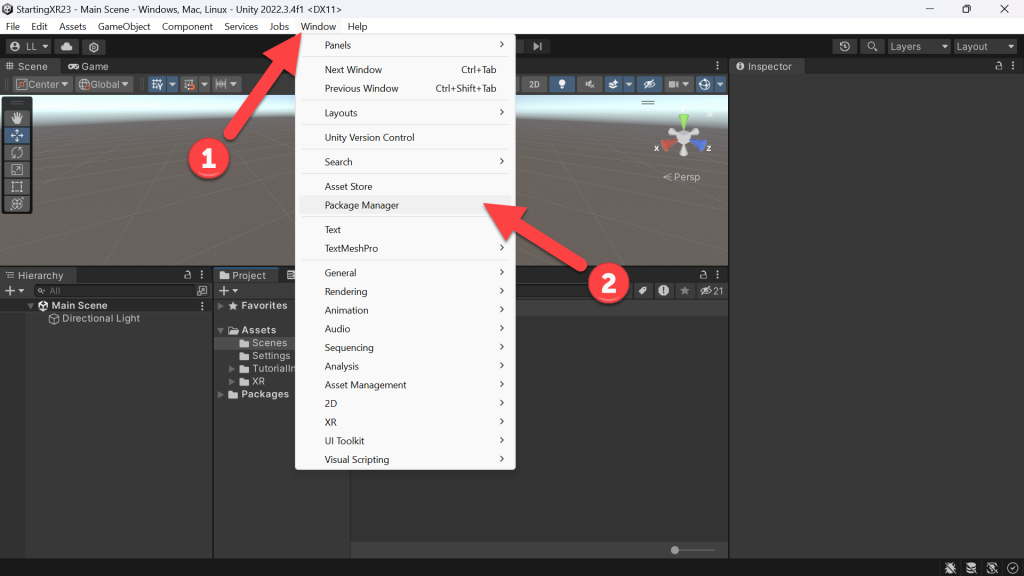
- (Toolbar) Click Window
- Click Package Manager
- (Package Manager) Click on dropdown arrow to open the menu
- Click Unity Registry
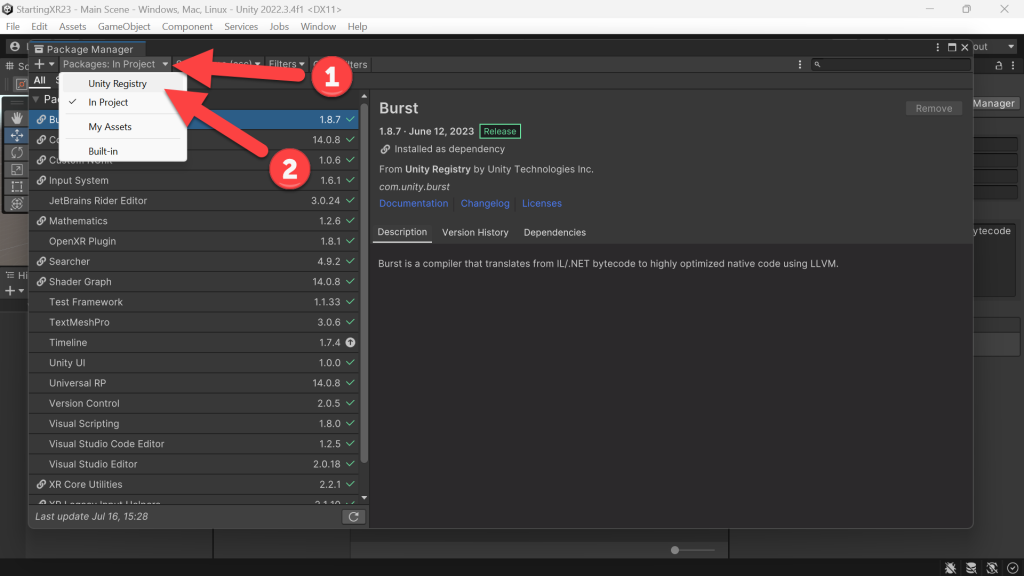
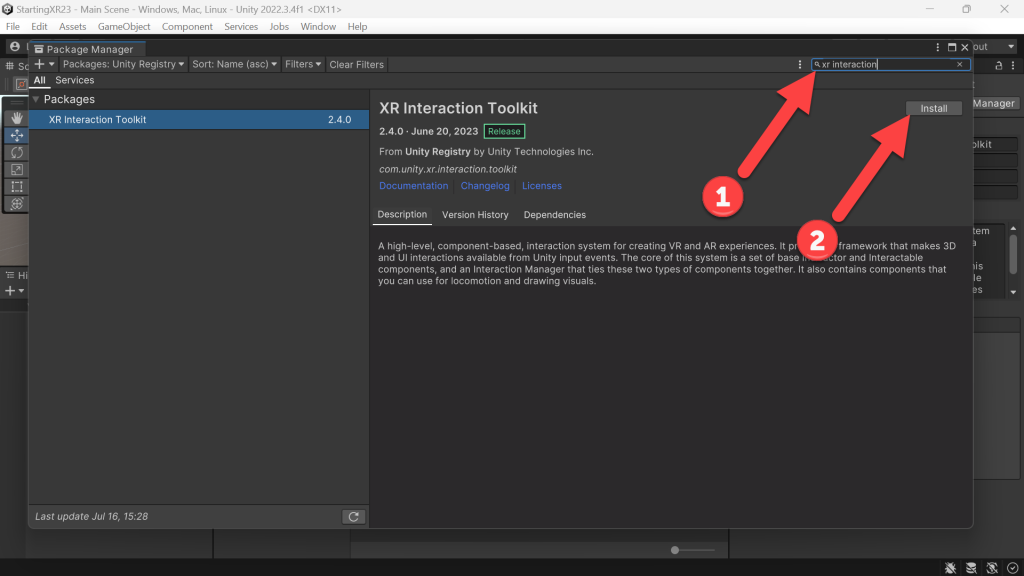
- Click in the search box -> Enter XR Interaction
- When XR Interaction Toolkit comes up -> Click Install
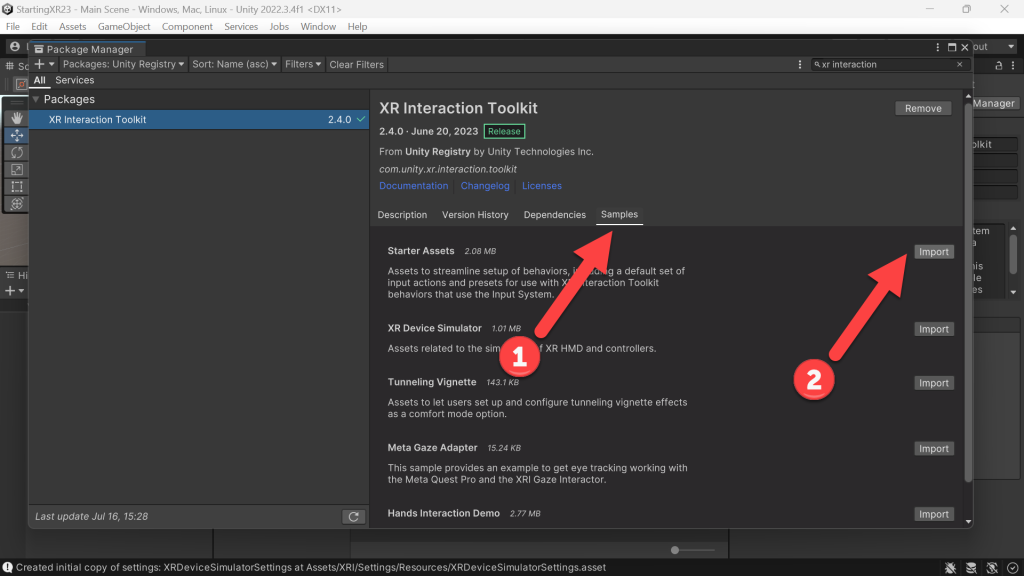
- Click Samples tab
- Click Import
Setup New Scene
Ok, so we’re going to setup our “Hello Cube!” (yes, my version of “Hello World!”)… 🙂
We’ll be adding a Plane (a flat square) for the ground, and a floating … wait for it … cube!
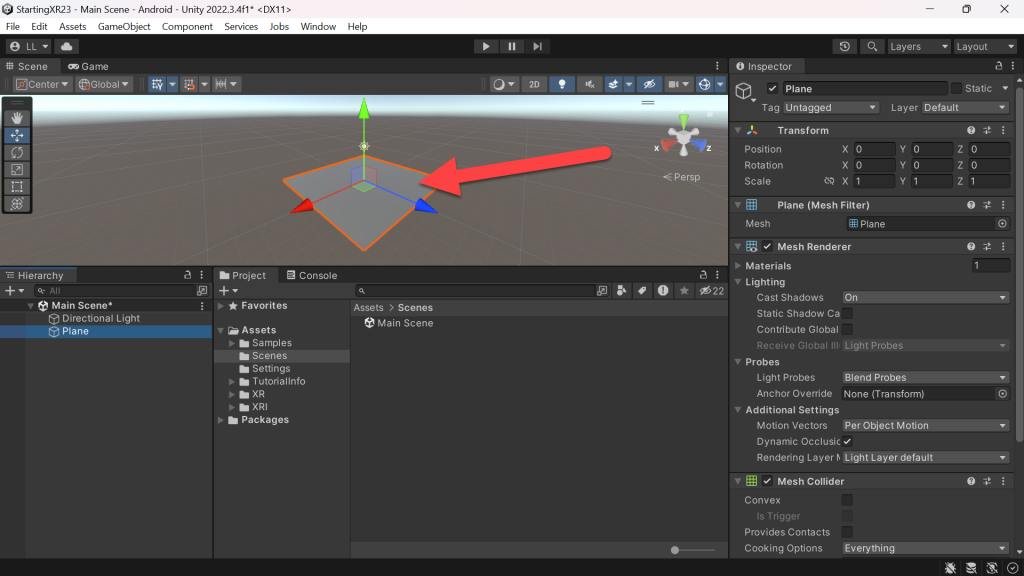
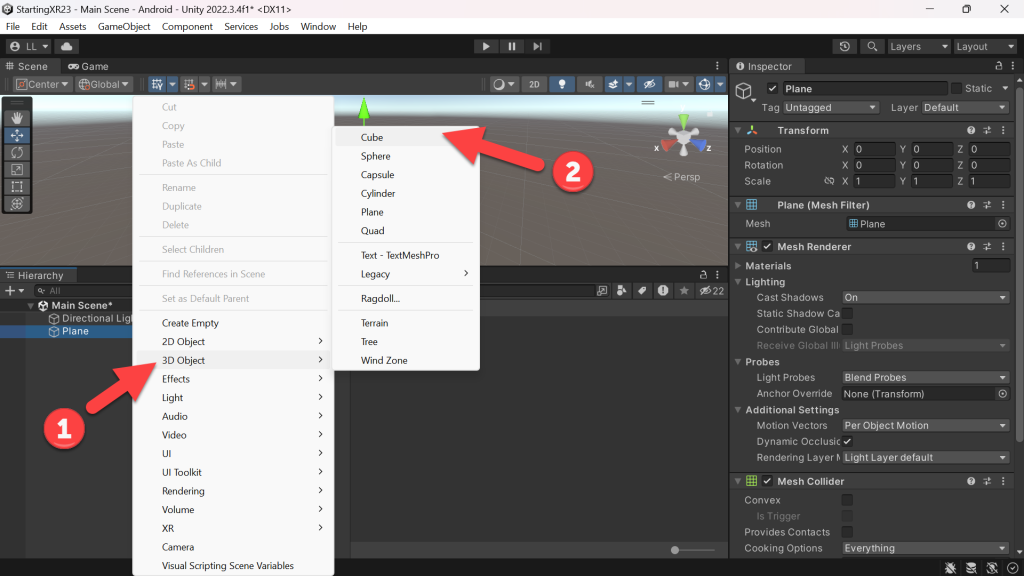
- (Hierarchy) Right-click -> Click 3D Object
- Click Plane

- There’s our ground!
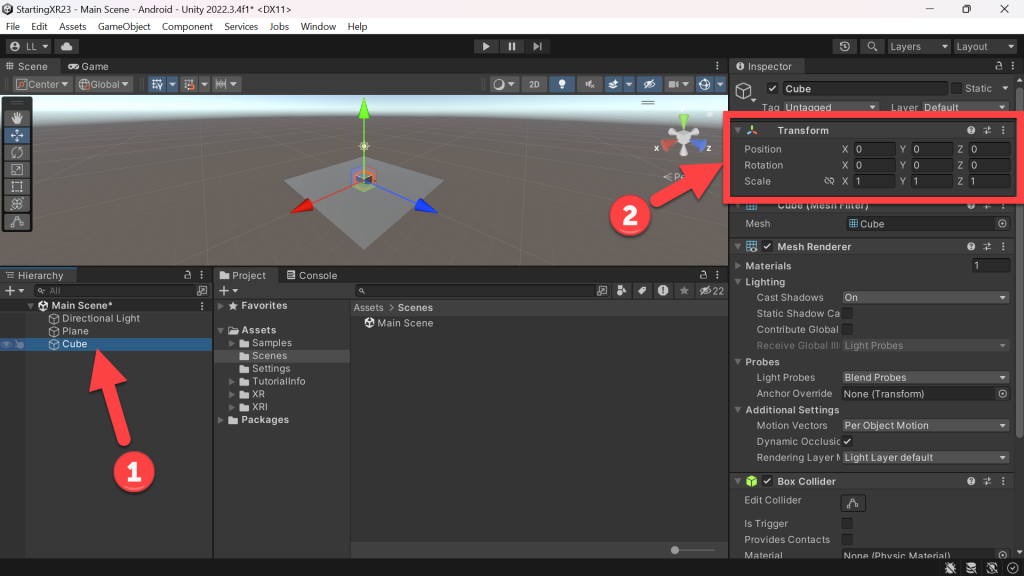
- (Hierarchy) Right-click -> Click 3D Object
- Click Cube
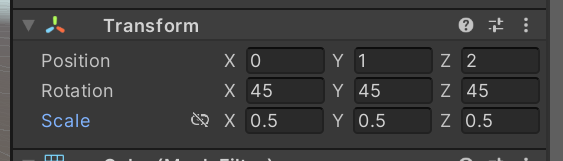
- (Hierarchy) Click Cube
- (Inspector) Edit the Transform values for the Cube with the following
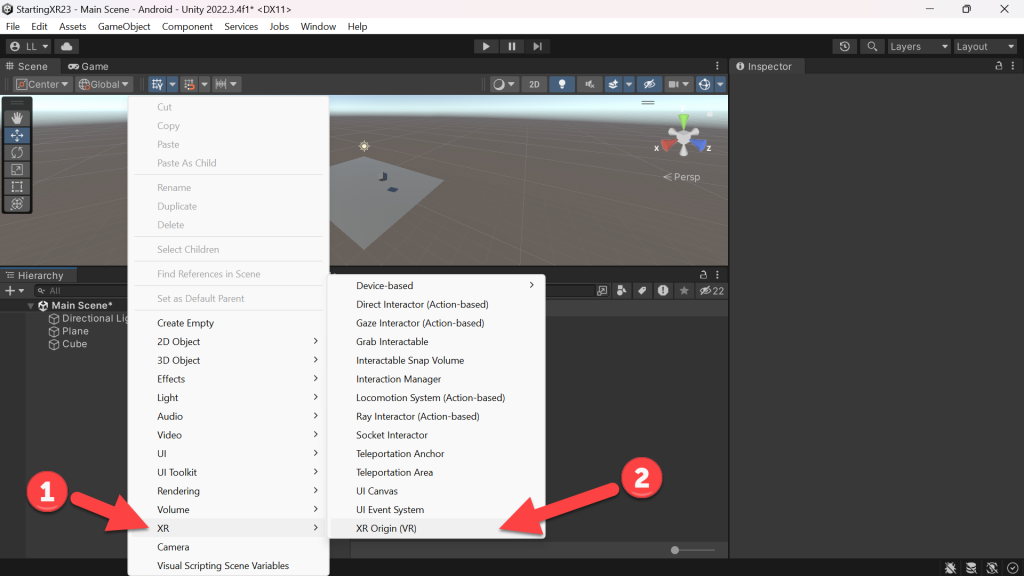
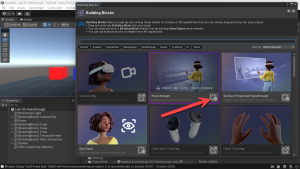
- (Hierarchy) Right-click -> Click XR
- Click XR Origin (VR)
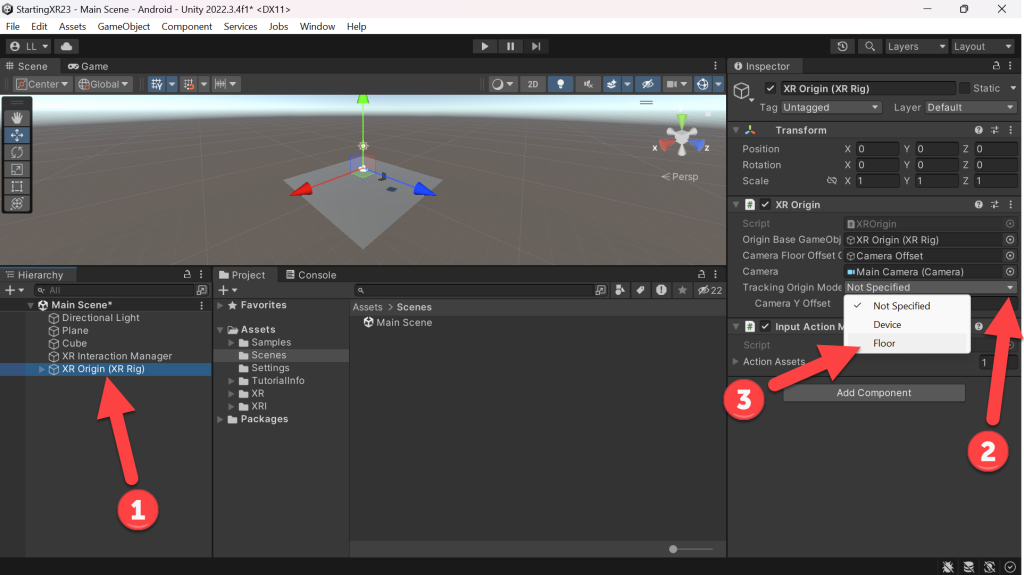
- (Hierarchy) Click XR Origin (XR Rig)
- (Inspector) XR Origin -> Tracking Origin Mode -> Click the dropdown arrow
- Click Floor
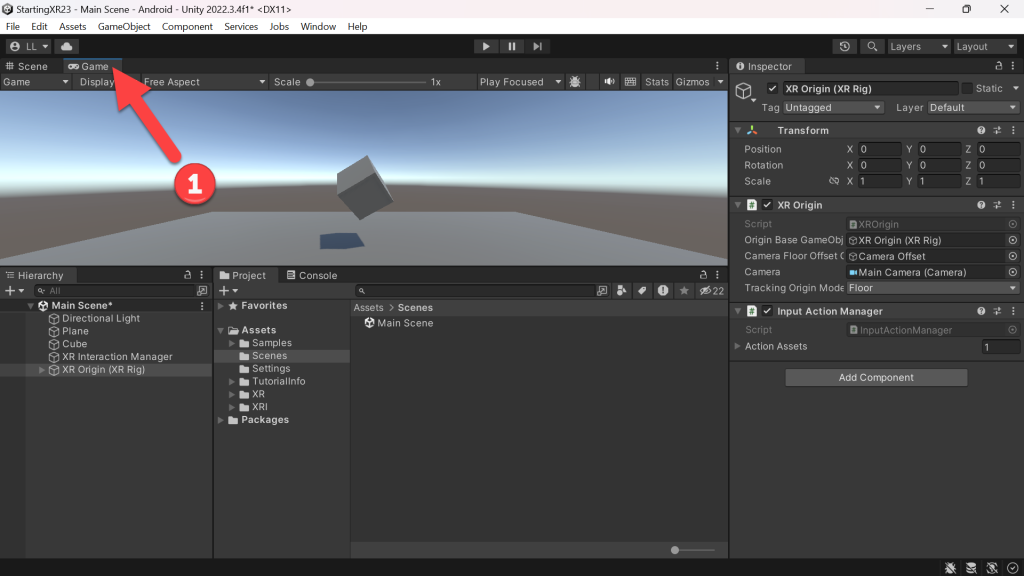
- (Game Window) Click the Game tab to see what the Camera will see… there’s our beautiful cube!
Build and Run on Quest
- Ok, can’t wait anymore – we need to see this running on our Meta Quest!
- (Toolbar) Click File
- Click Build Settings…
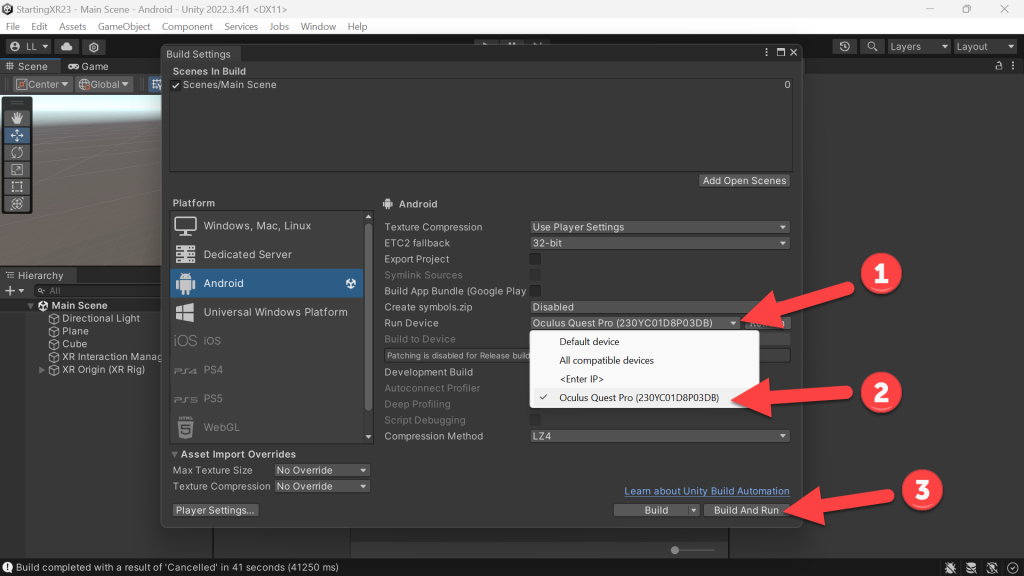
- (Build Settings) Click the arrow dropdown next to Run Device
- If your Quest is connected to your computer, and you’ve given it permissions – you should see your device
- Click Build And Run
- (Build Android Window) Click New Folder
- Name the folder Install
- Click Open
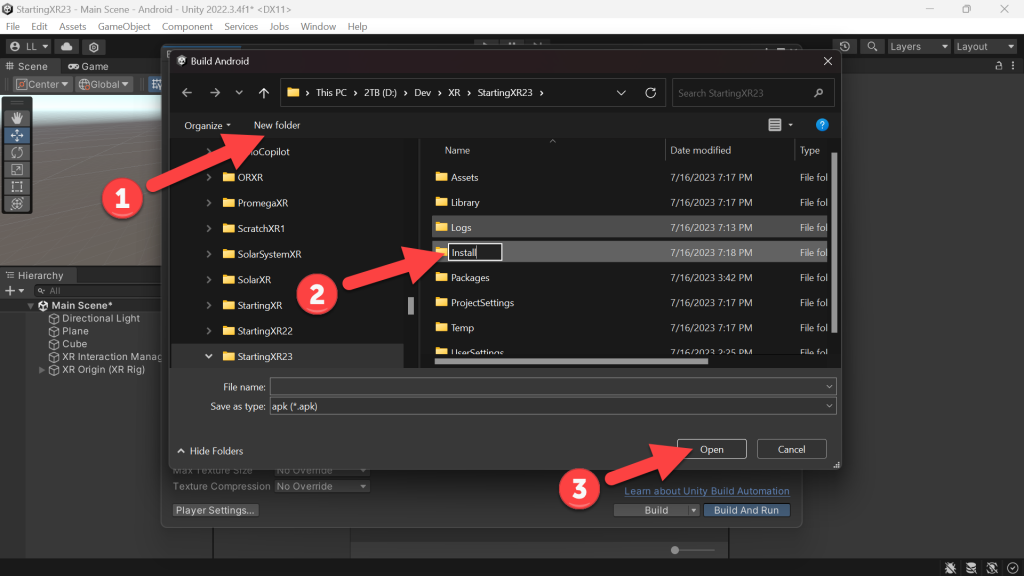
- Name the file Install
- Click Save

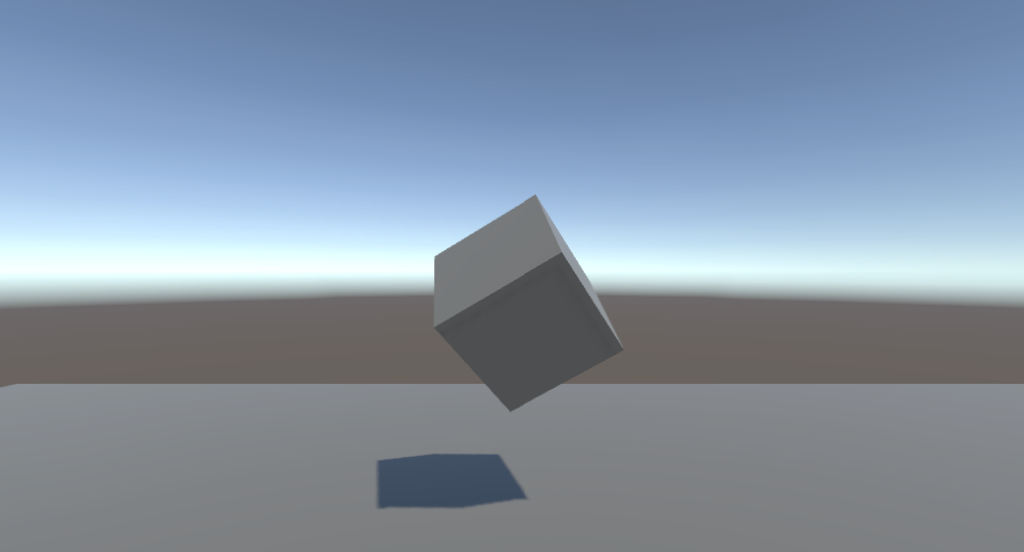
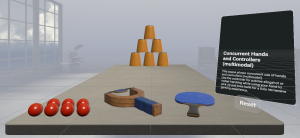
- Look at that! You’ve built your newest XR “Hello Cube!” and you’re seeing it on your Quest!!!
- Congratulations for all your hard work – you’re now part of a very select group of geeks that have build their very own XR experience. 🙂
Bonus: Spinning Cube!
- Now let’s see how easy Unity makes it to do some amazing things, today we’ll start by making the Cube spin!
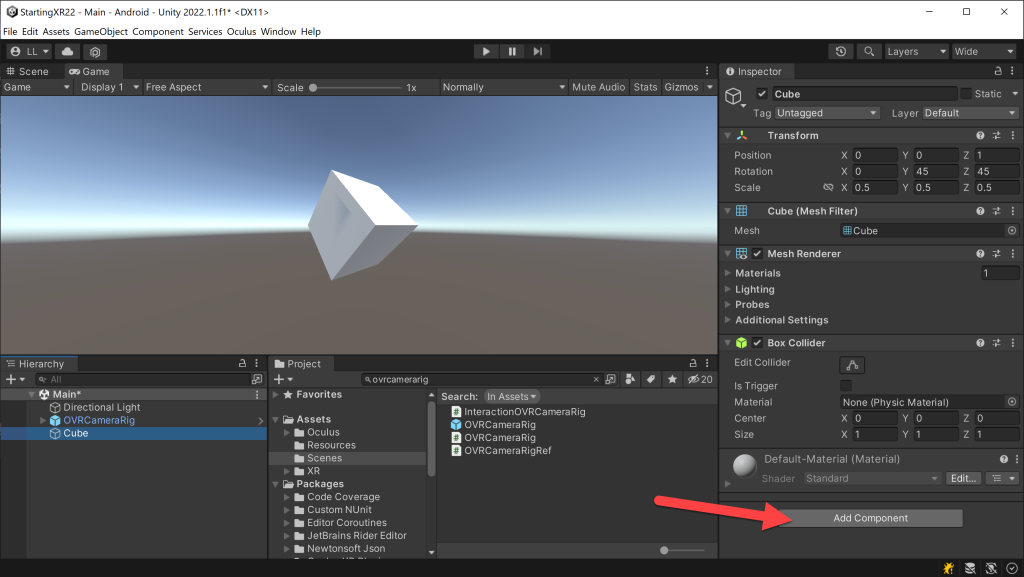
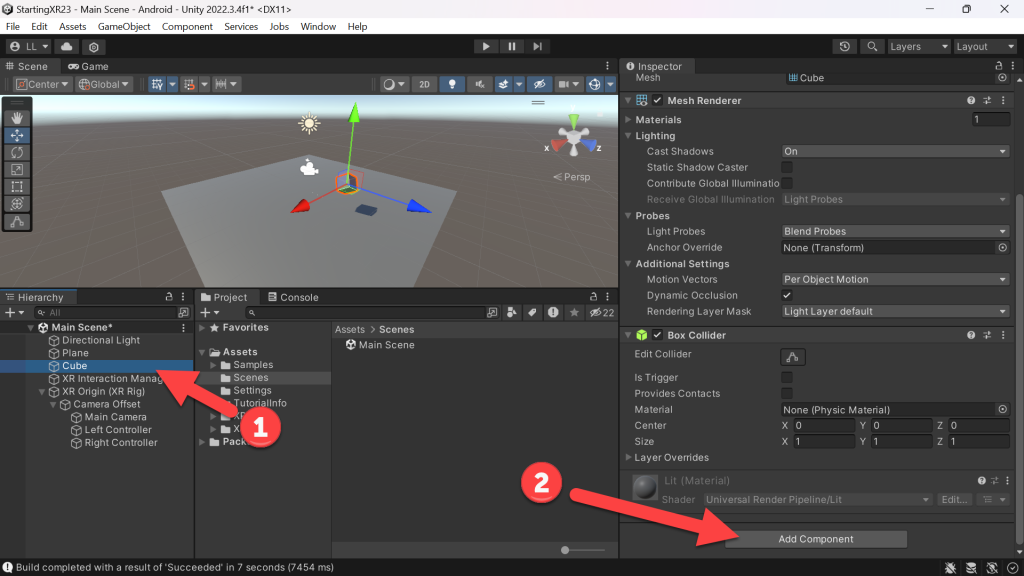
- (Hierarchy) Click Cube
- (Inspector Window) Click Add Component
- (Hierarchy) Click Cube
- (Inspector Window) Click Add Component
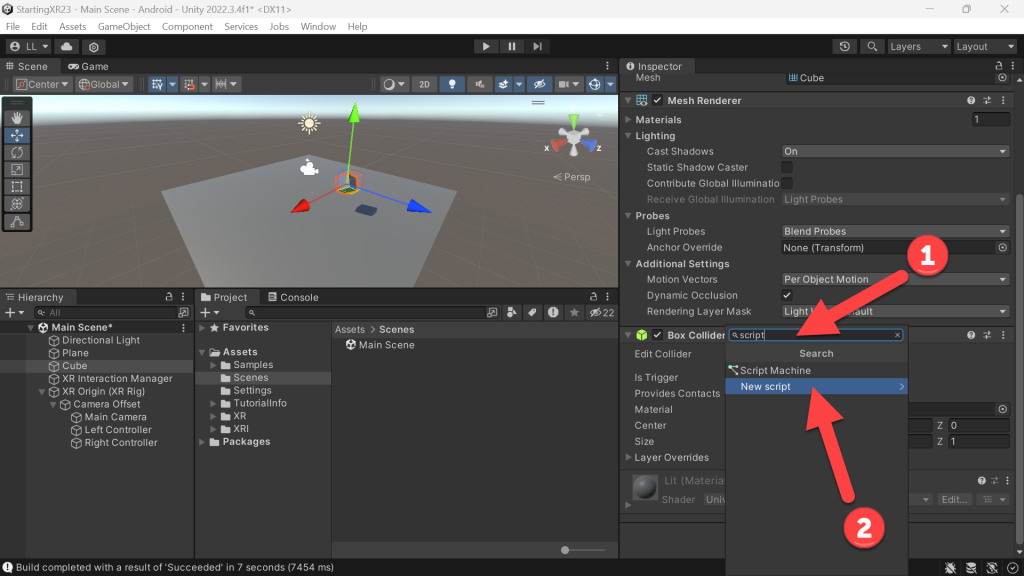
- (Add Component Search) Type script
- Click New Script
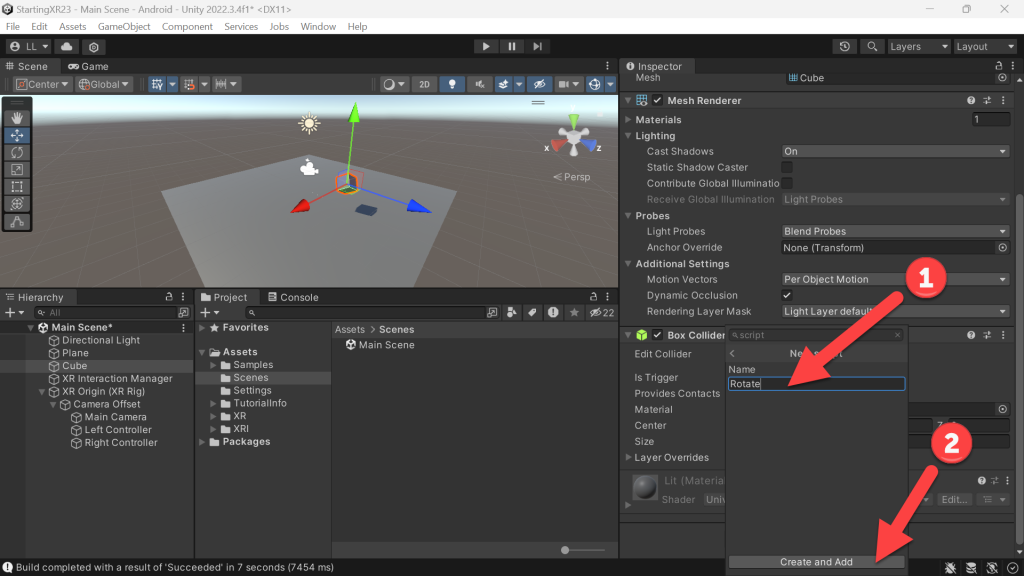
- (Add Component Name) Name your new script Rotate
- Click Create and Add
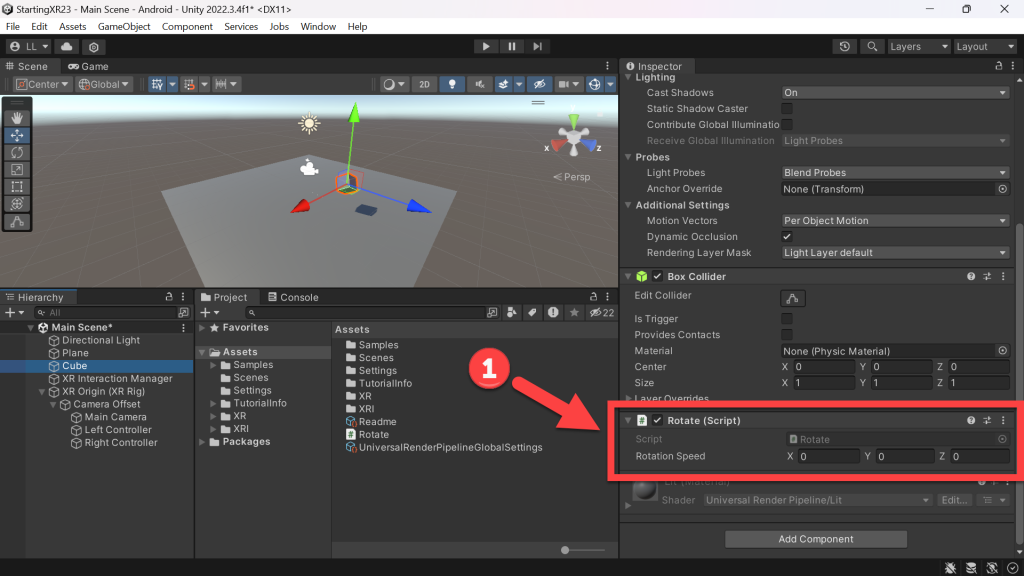
- (Inspector) Rotate (Script) -> Double-click the Rotate script name
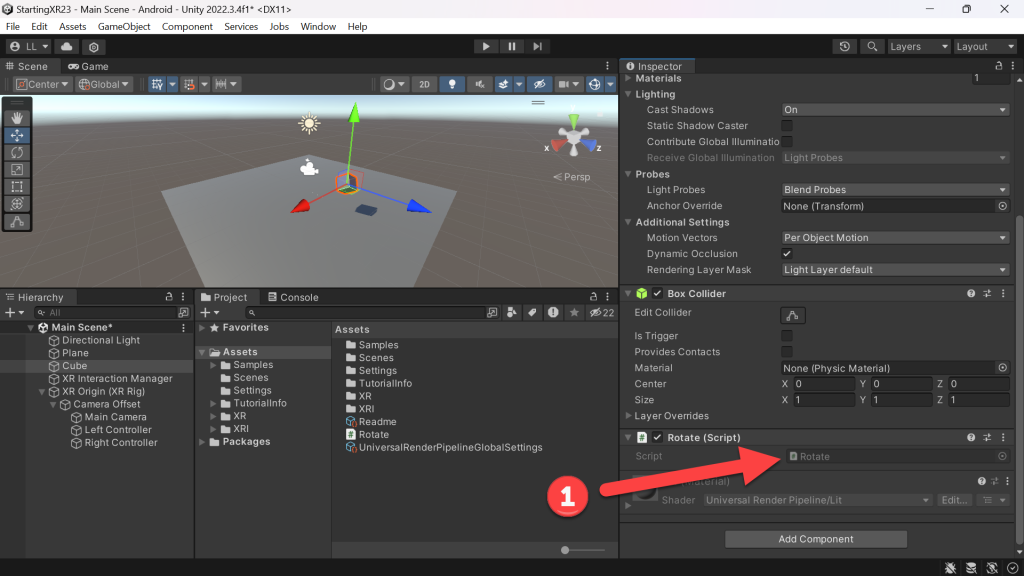
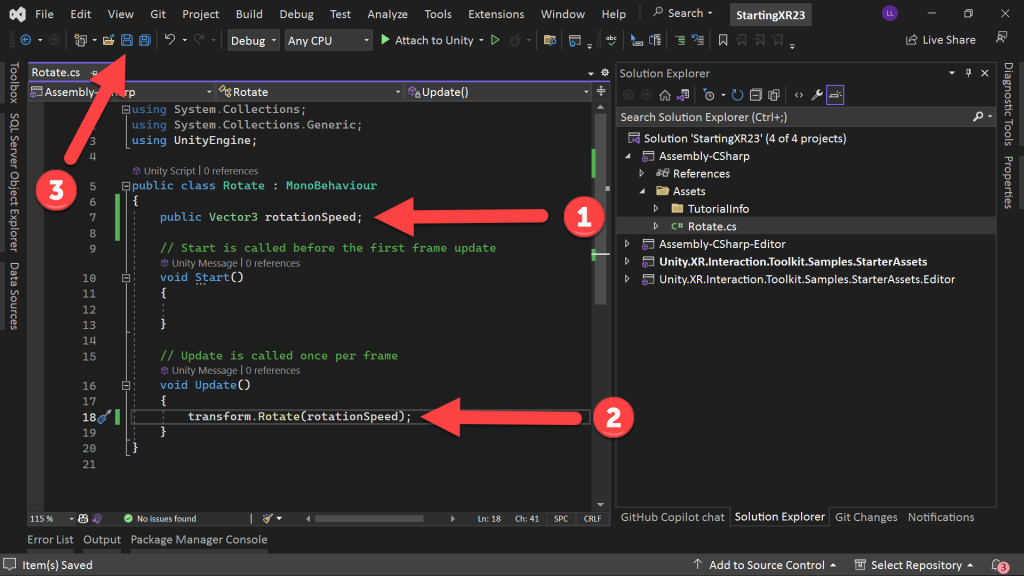
- Visual Studio will launch and you’ll see two methods in your new C# script
- Start(): Runs once before the cube is created in the scene.
- Update(): Runs every frame, refresh is generally 60 to 90 frames/second.
- Just add the two lines below and Save your changes!
- (Visual Studio) Add the code…
public Vector3 rotationSpeed; - Add the code…
transform.Rotate(rotationSpeed); - Click Save
- (Inspector Window) Change the Rotate script’s parameters to 0.1 for X, Y, and Z.
- Feel free to play with these values – see what changing them does… What happens if you make them really fast?

- Now run your project on your Quest!
- Remember you can just click File -> Build And Run
- That’s it! You should now see a rotating cube in your XR experience on your Quest! Congrats to you!
I always love feedback and suggestions for new XR / AI blog posts!
Go build something amazing in XR & AI! — Lance 🙂
Check out other blog articles in this (and other) series!
Quick links to Lance’s latest XR Step-by-Step blog articles by device

One thought on “XR Step-by-Step 2023! Meta Quest: Setting up your Meta Quest XR Project! Unity 2022 + Open XR + XR Interaction Toolkit”