Virtual and Augmented Reality together are now referred to as XR or “Extended-Reality”.
You’re in the right place at the right time to build something amazing in XR!
XR applications can be created in Unity for many devices, our focus will be on Microsoft Hololens 2 and the Meta Quest 2 / Pro.
In this specific blog post series we will focus on Hololens 2 in the latest Unity and Visual Studio!
Want to see the other blog articles in this (and other) series?
Click here to see all of my XR Step-by-Step blogs separated by device and version!
As you can see from our previous step-by-step tutorials – it’s amazing to build XR applications for the Hololens — but — you quickly find out that it takes toooo long to build and deploy the solutions from your PC to the Hololens.
If only you could just push the play button in Unity and have it show up on your Hololens…
Good news, you can! Microsoft came out with a solution and it’s called Holographic Remoting Player! It allows us to stream the holographic content from your PC to your Hololens in real-time via Wi-Fi.
Let’s jump in…
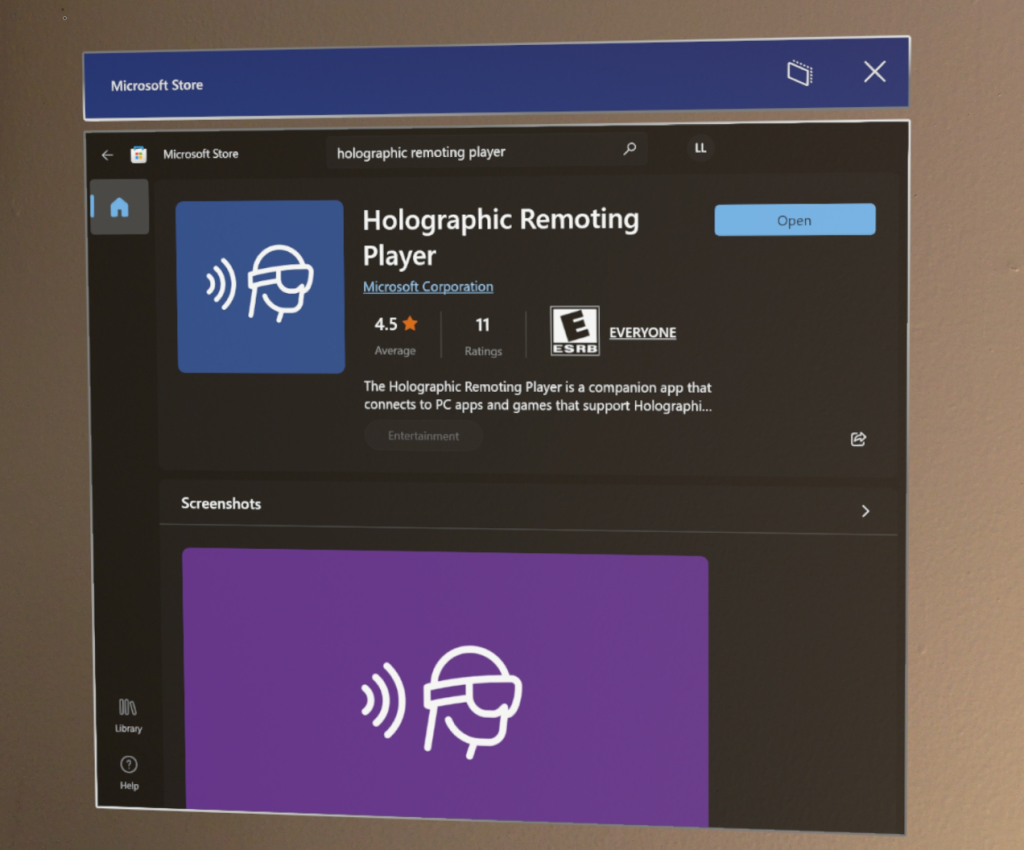
- On your Hololens, open up the Windows Store – search for Holographic Remoting Player and install
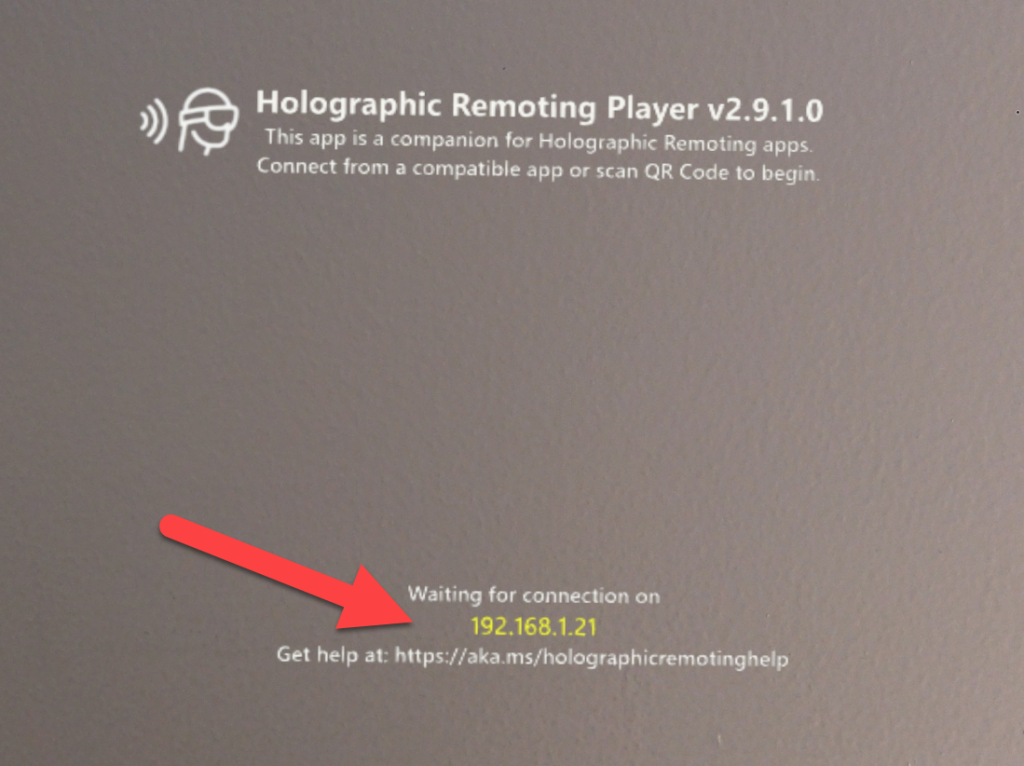
- Once it’s installed, run it and you should see the following — you’ll see your IP listed in yellow — note this for later
- (Unity Toolbar) Click on Mixed Reality
- Click Remoting
- Click Holographic Remoting for Play Mode

- (Unity) This will bring up the Holographic Remoting for Play Mode dialog box – I recommend dragging it into the same tab group as your Project and Console tabs

- (Holographic Remoting for Play Mode) Click the Enable Holographic Remoting for Play Mode button

- (Holographic Remoting for Play Mode) Enter your IP address in the Remote Host Name field as you see it displayed in the Holographic Remoting Player running on your Hololens
- (Unity) Click Play

- Here’s an issue, our background has changed from the Solid black color to the Skybox?!? WTF?

- Let’s check our Main Camera settings…
- (Hierarchy) Expand the MixedRealityPlayspace -> Click Main Camera
- (Inspector) Hmmm… Know we had Camera -> Clear Flags set to Solid, but now it’s set to Skybox after we clicked Play — set it back to Solid Color

- (Unity) Click Play
- And now we see it automatically switch to Skybox?!?
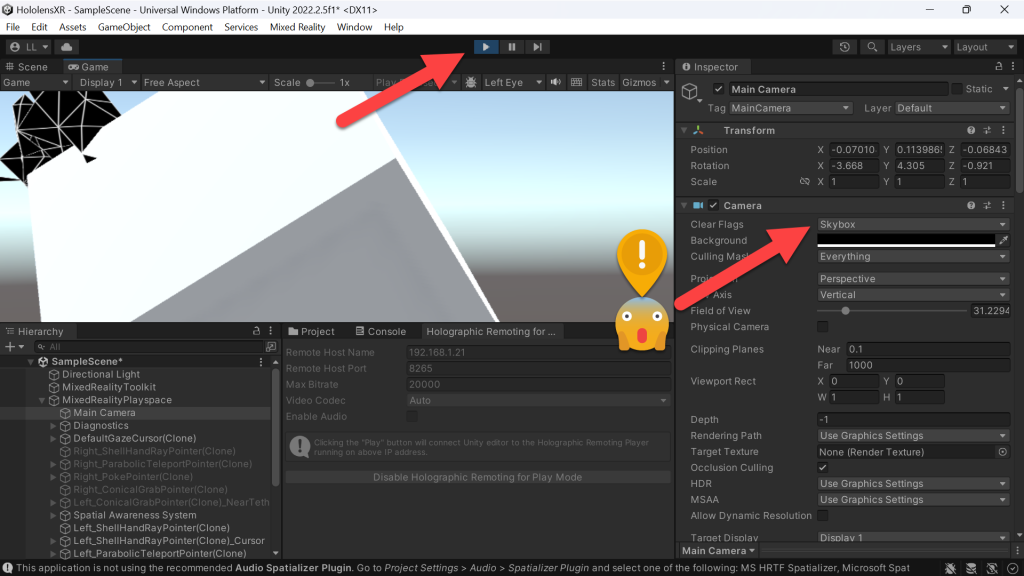
- Ok, here’s the trick to solve this… In MRTK we have defaults for settings – in this case the Camera‘s default setting for Clear Flags is Skybox and this is getting applied when we run in Play mode with Holographic Remoting — so here are the steps to fix that.
- (Hierarchy) Click MixedRealityToolkit
- (Inspector) Click Copy & Customize
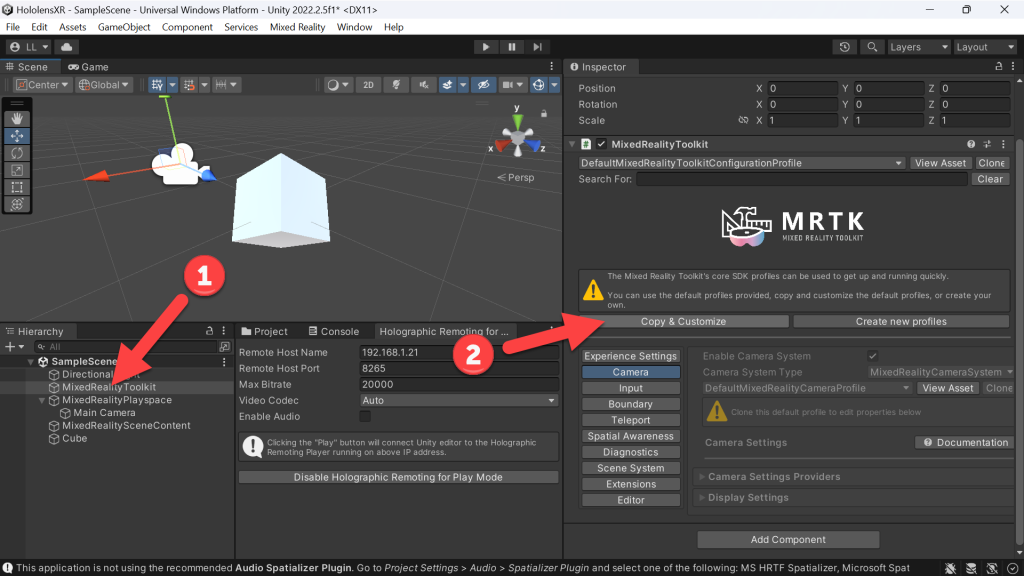
- (Clone Profile) Click Clone
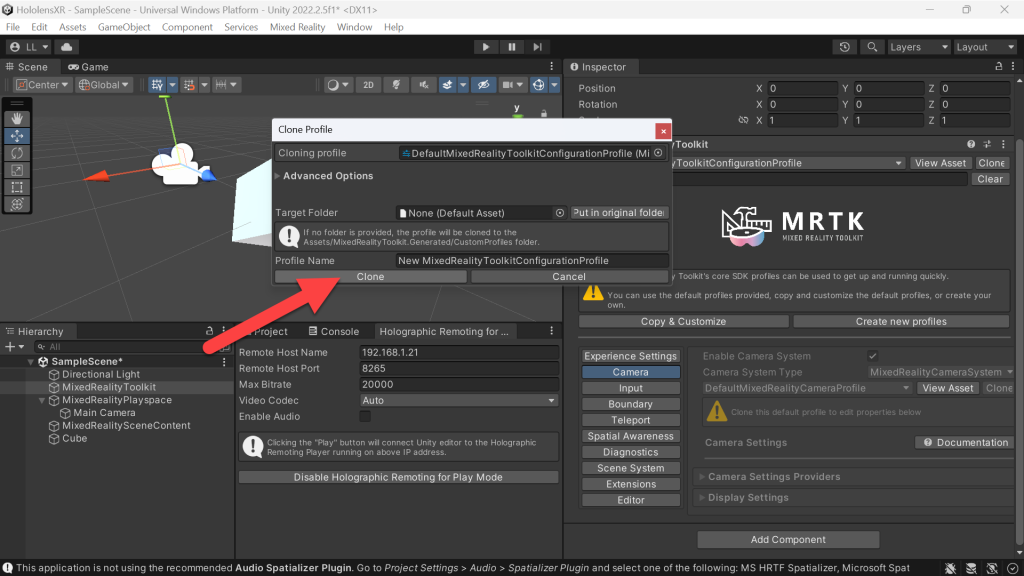
- (Inspector) Click Camera
- (Inspector -> Camera) Click Clone

- (Clone Profile) Click Clone
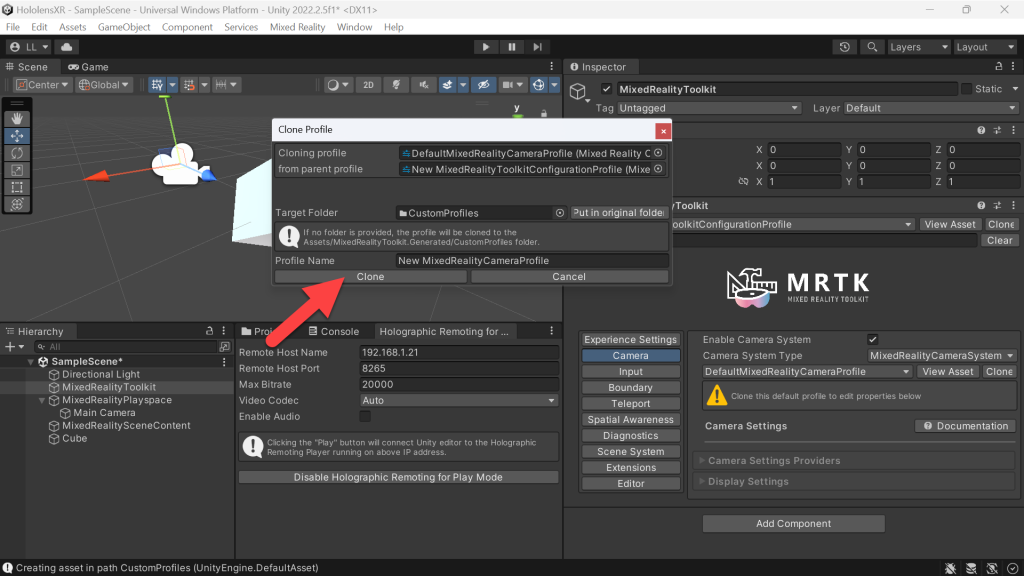
- (Inspector -> Camera) Expand Display Settings
- (Display Settings) Click Quality Settings -> Change to Color (which is the same as Solid Color)
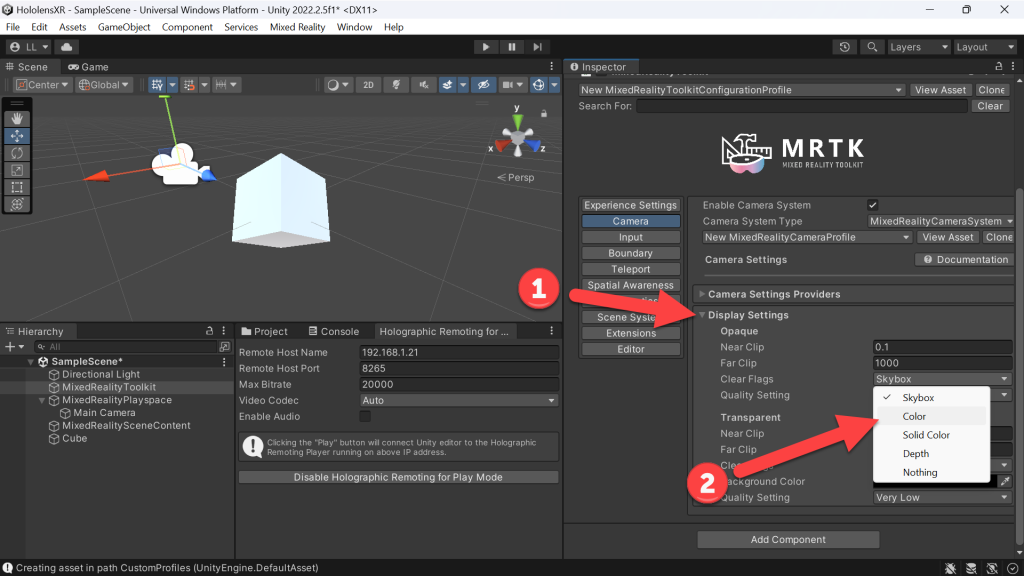
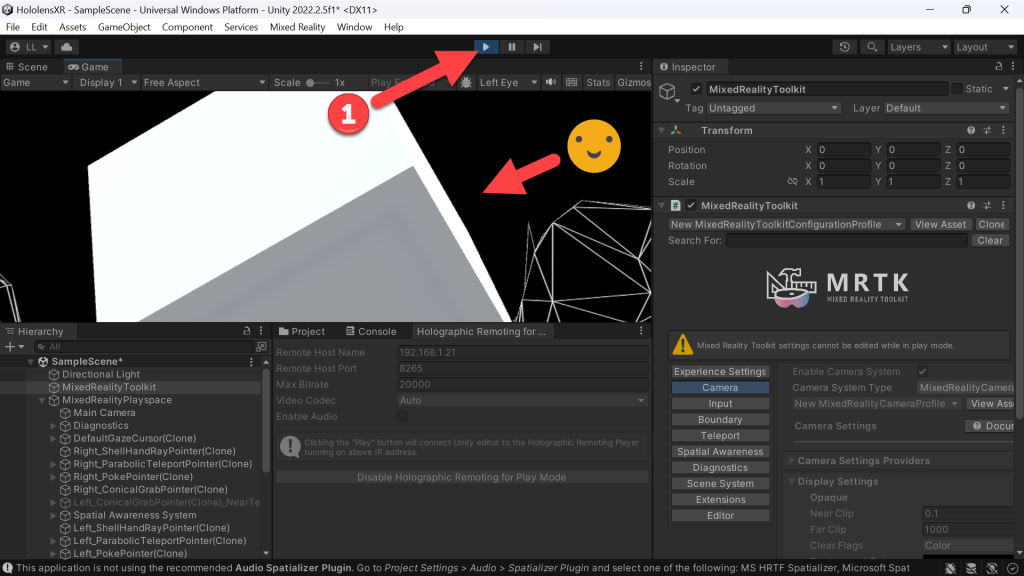
- (Unity) Click Play
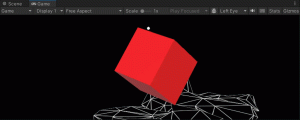
- Now not only are we seeing a live streamed version of our application on the Hololens, but the background is transparent as we expect!! 🙂
Want to see the other blog articles in this (and other) series?
Click here to see all of my XR Step-by-Step blogs separated by device and version!


One thought on “XR Step-by-Step 2023! Hololens 2: Holographic Remoting in Unity 2022 + Solving Skybox Issue”